
In this section, you can learn more about:
Logging time directly from a work item (issue) view
If you're already inside the work item (issue) you want to log time for:
-
Click on the Time tracking field or the Actions (⋯) three dots in the top-right corner.
-
Select Log work.
-
Enter the amount of time in the Time spent field.
-
Click Save to confirm your entry.
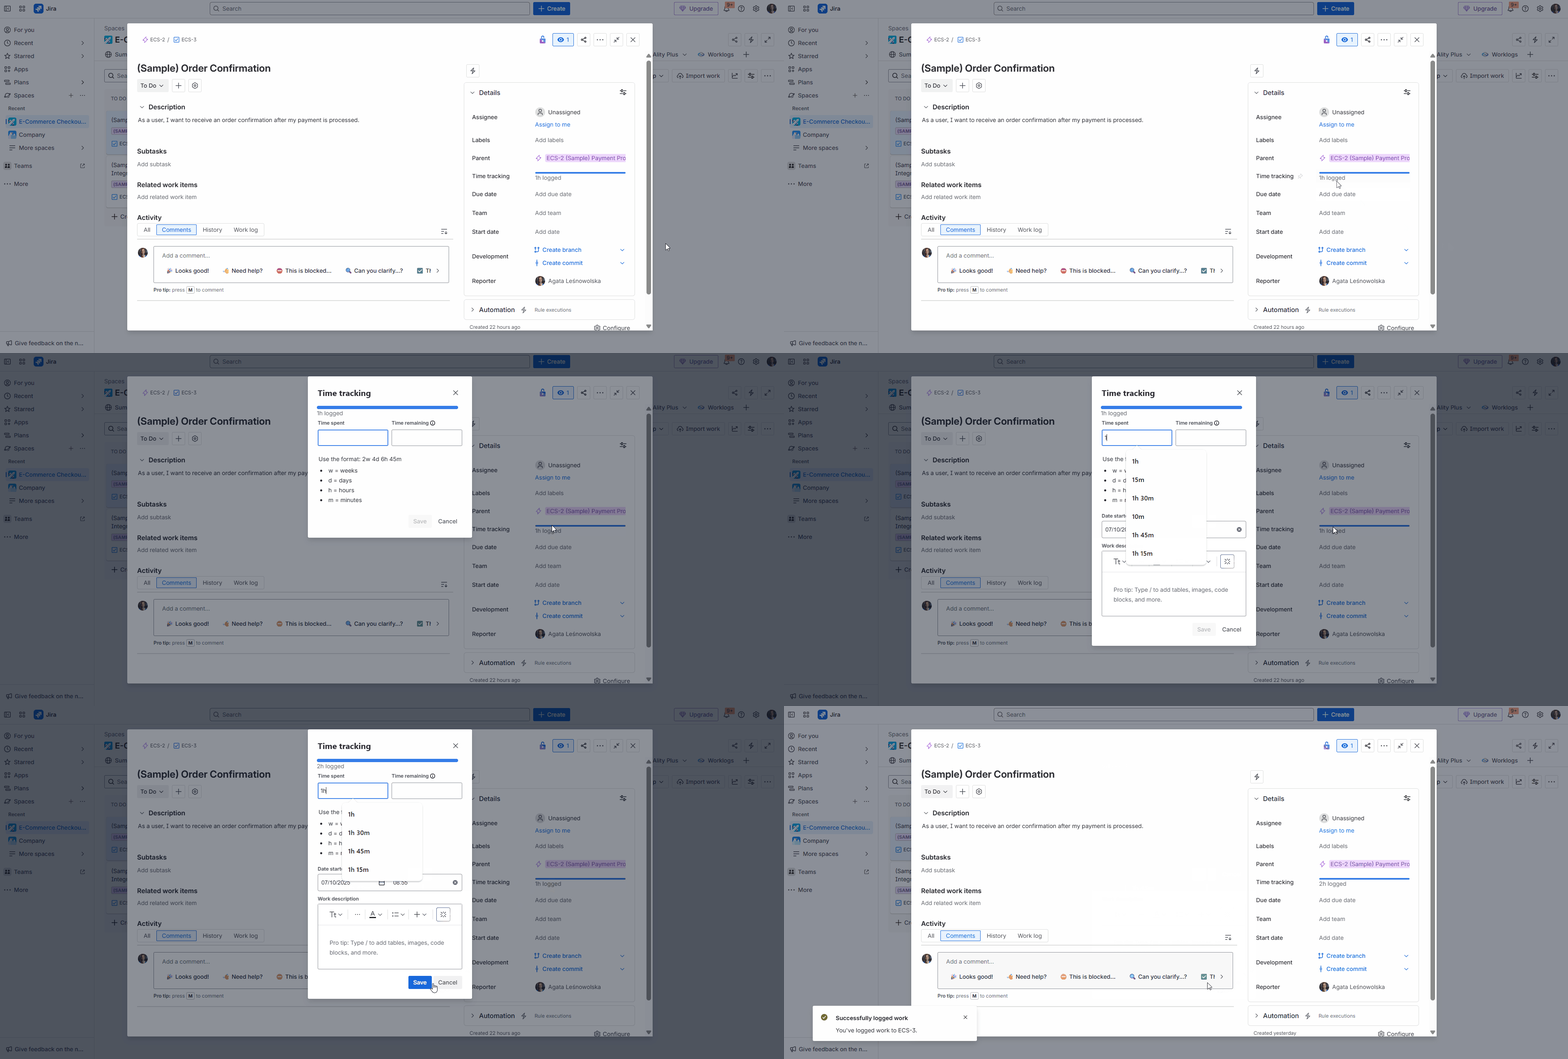
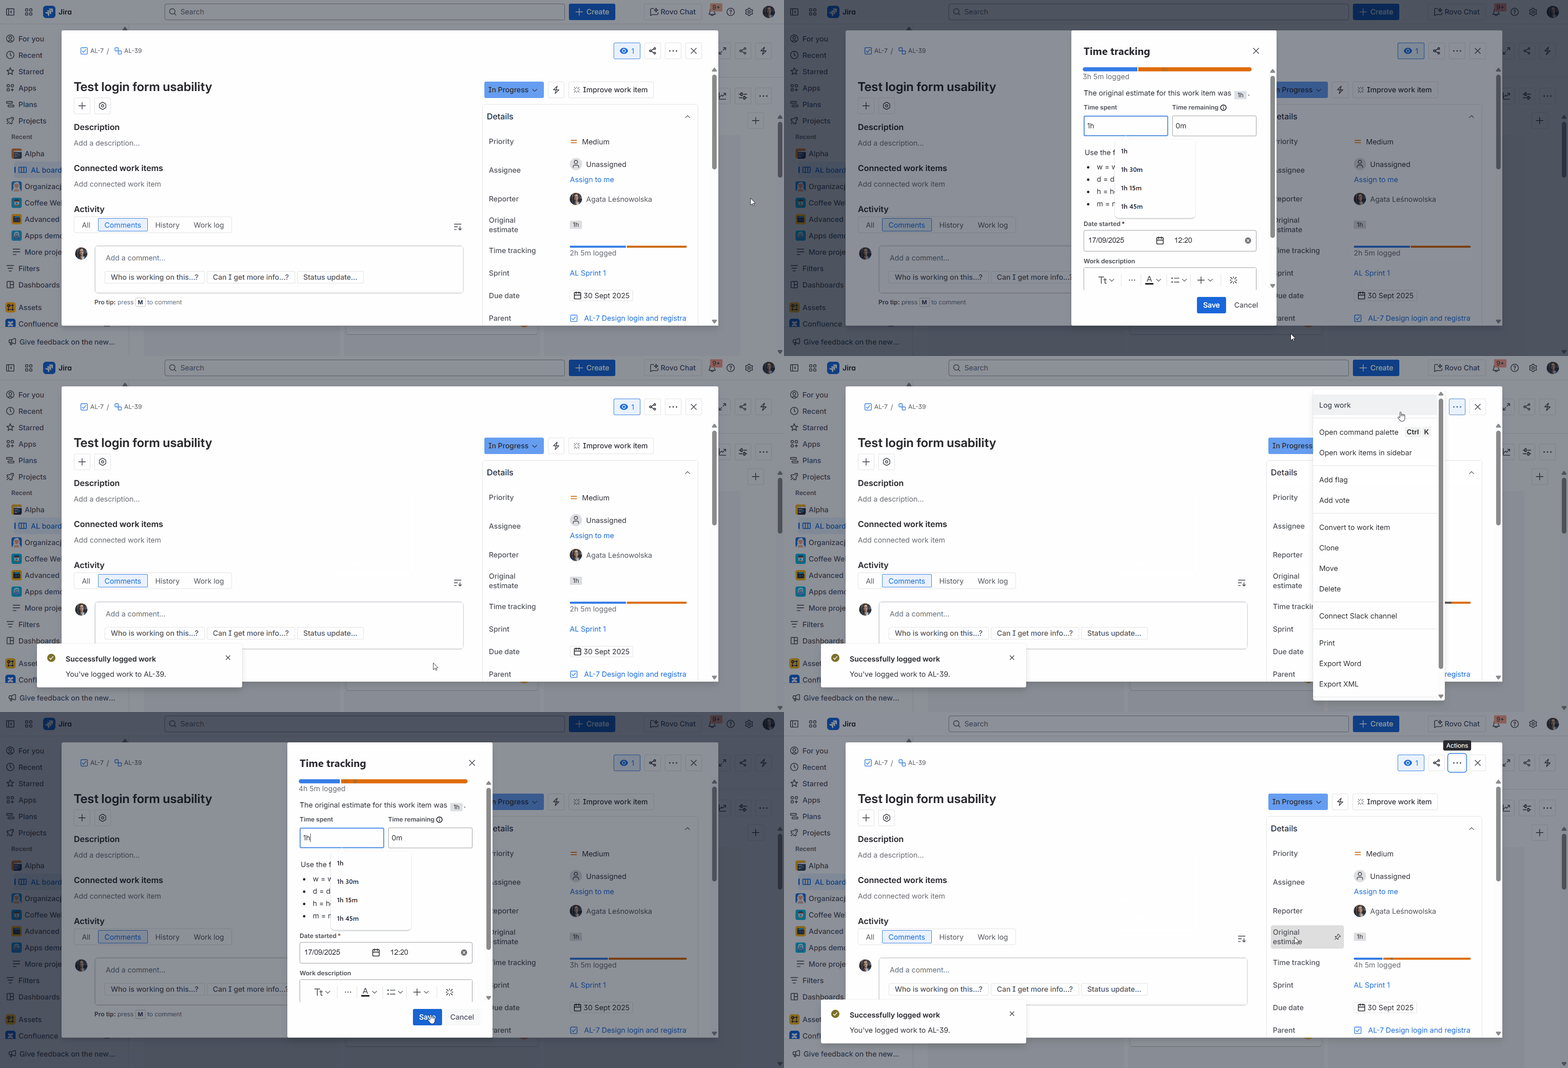
Logging time from the Worklogs app view
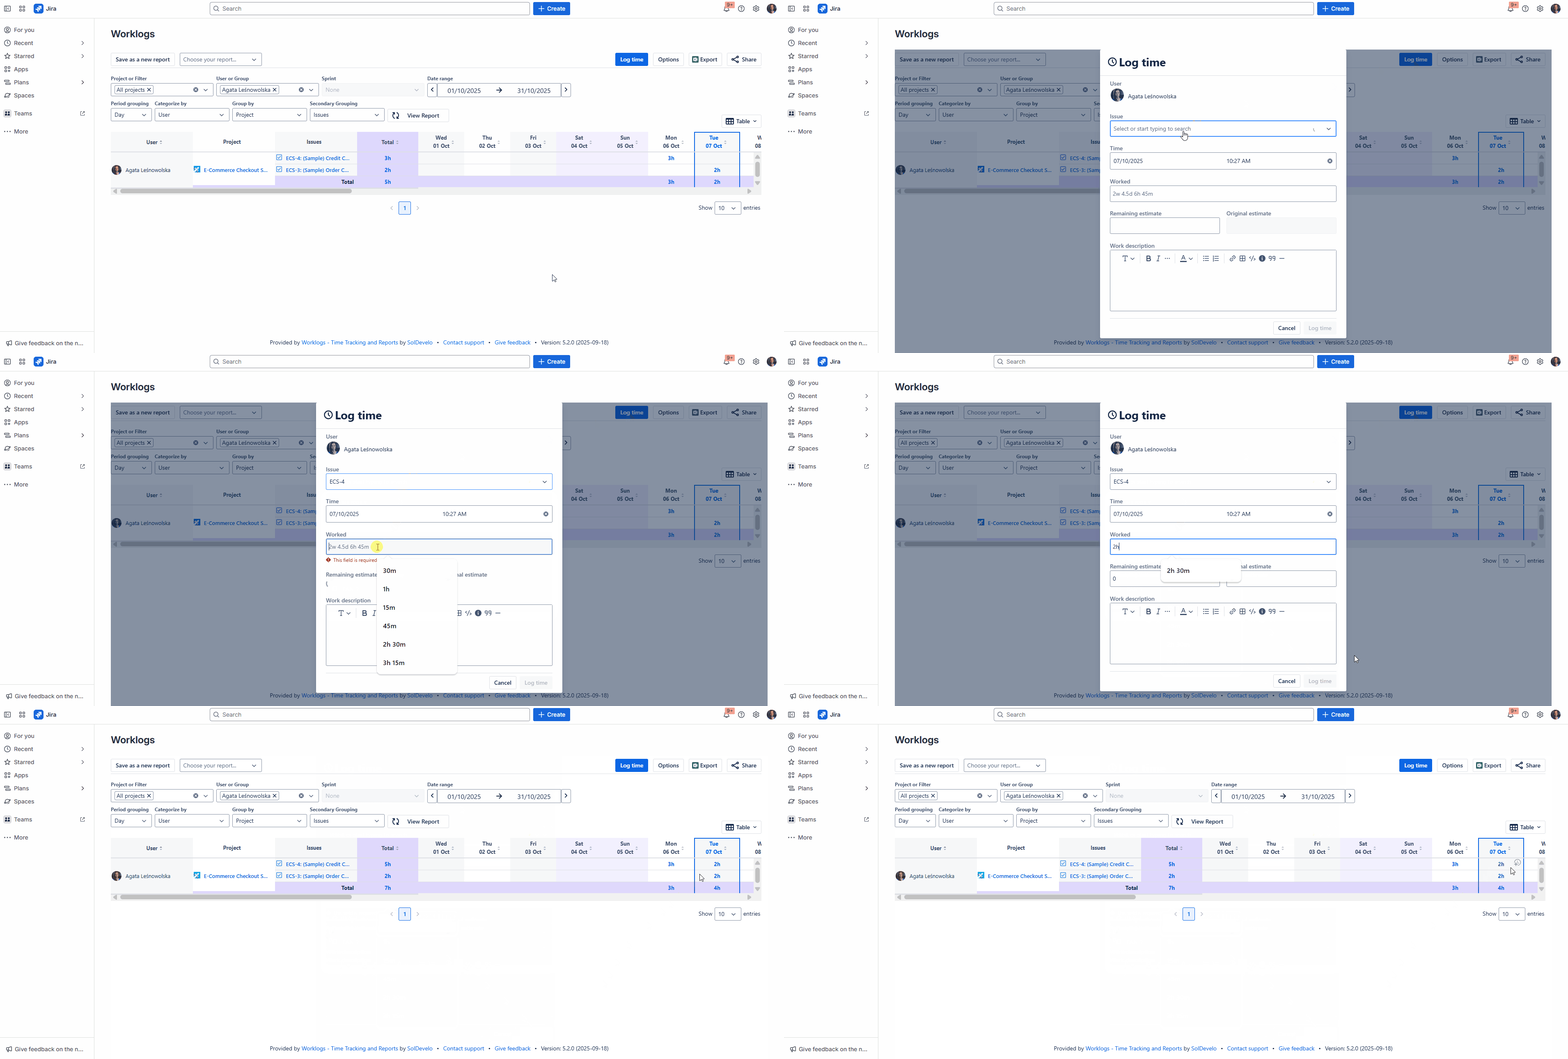
You can avoid opening every single Jira issue to log the time and log time directly from the Worklogs page. In order to do that:
-
Click the blue Log time button.
-
Select the work item (issue) you want to log time against from the pop-up window.
-
Choose the starting date and enter your worked time.
-
Click Log time to save your changes and close the window.
🔍 If you can't find the right work item (issue) in the dropdown, you can just start typing the work item (issue) key (like PROJ-123) to find it instantly!
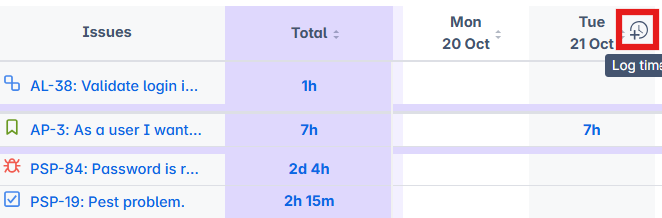
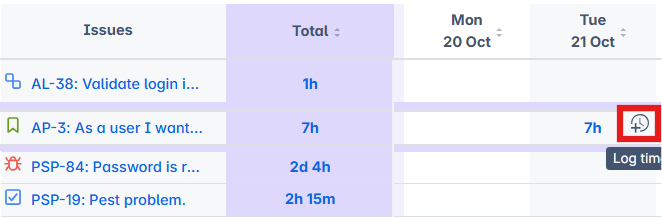
It is also possible to log time by clicking on the grey icon in the Worklogs table. It’s available in the table header or in the individual cells if you’re grouping by issues.
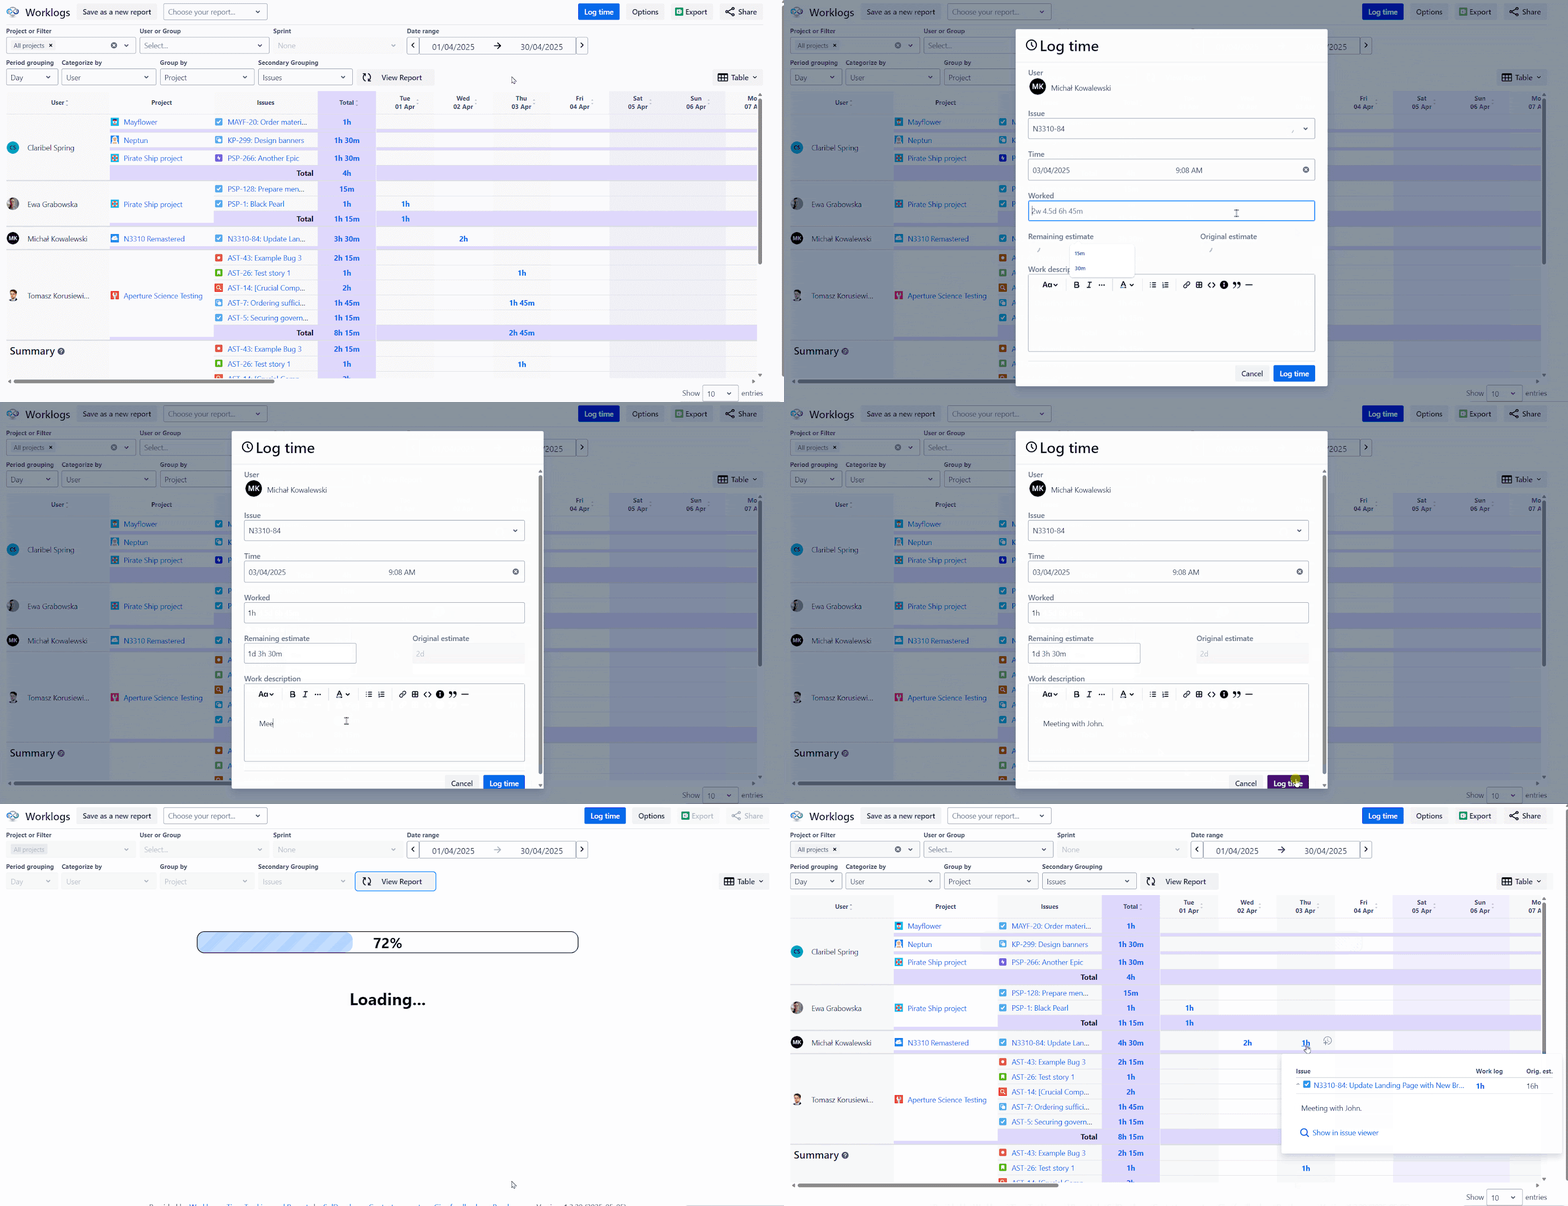
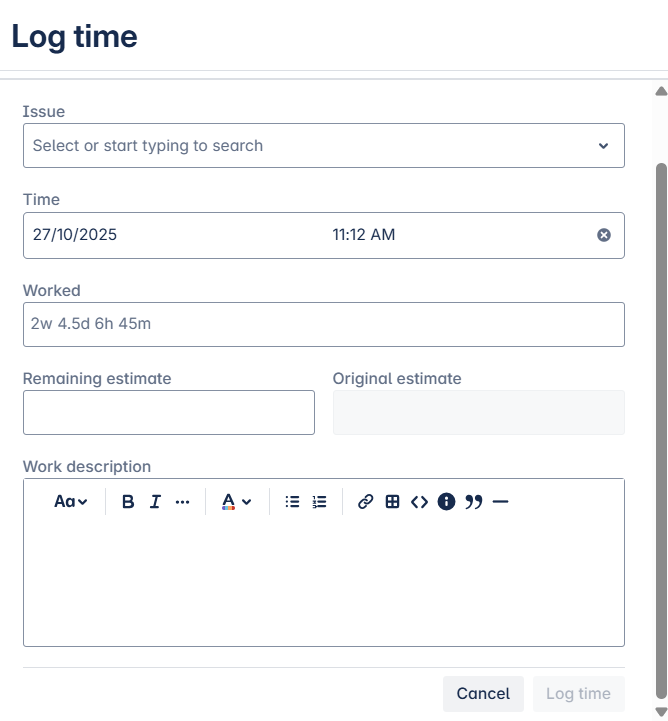
In the log time window, you're required to select the issue you want to log time into and the number of hours you spent working on this issue.
Additionally, you can also provide a short description and change the remaining estimate. If the estimation was set for the issue, it will automatically update after providing the worked time.
Displaying details of logged time
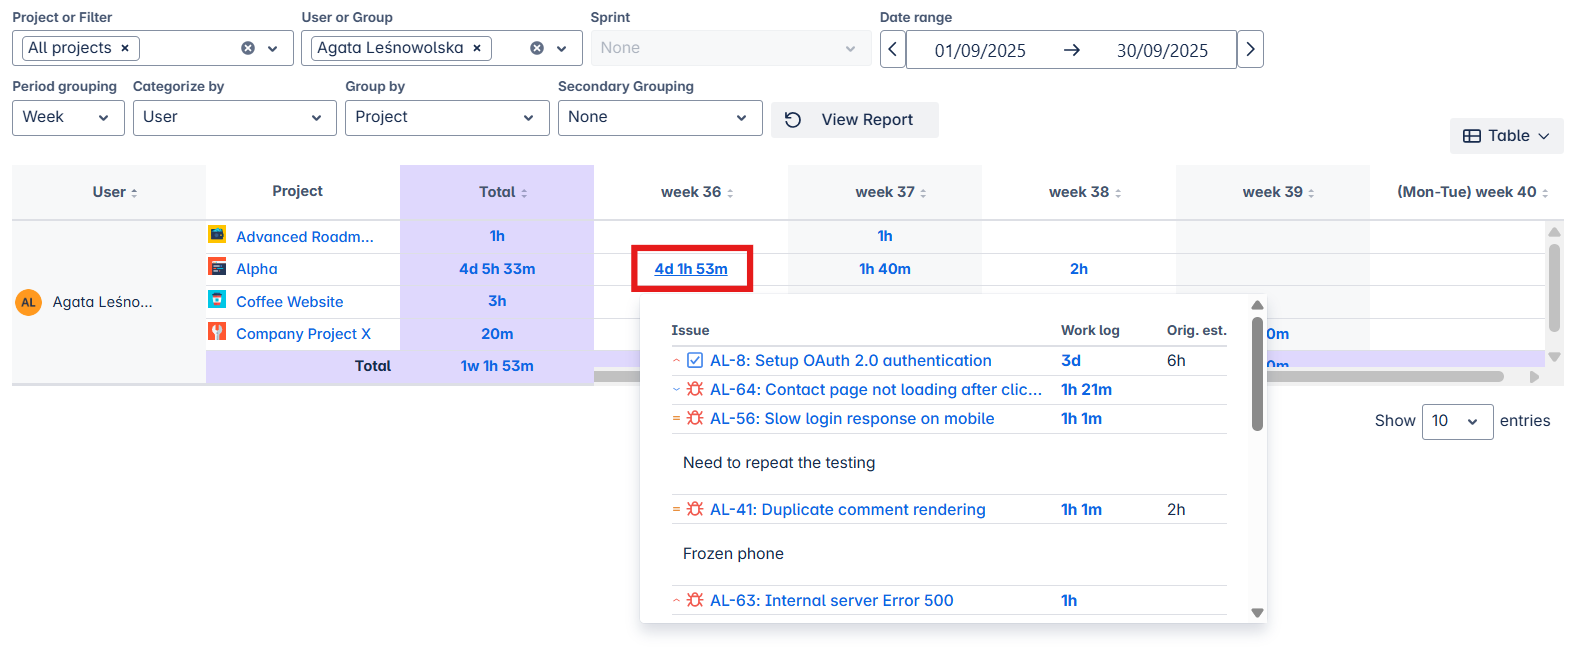
In order to get a list of all the time entries that contribute to the time displayed in any cell in the Worklogs table, click on the particular time.
Cloud
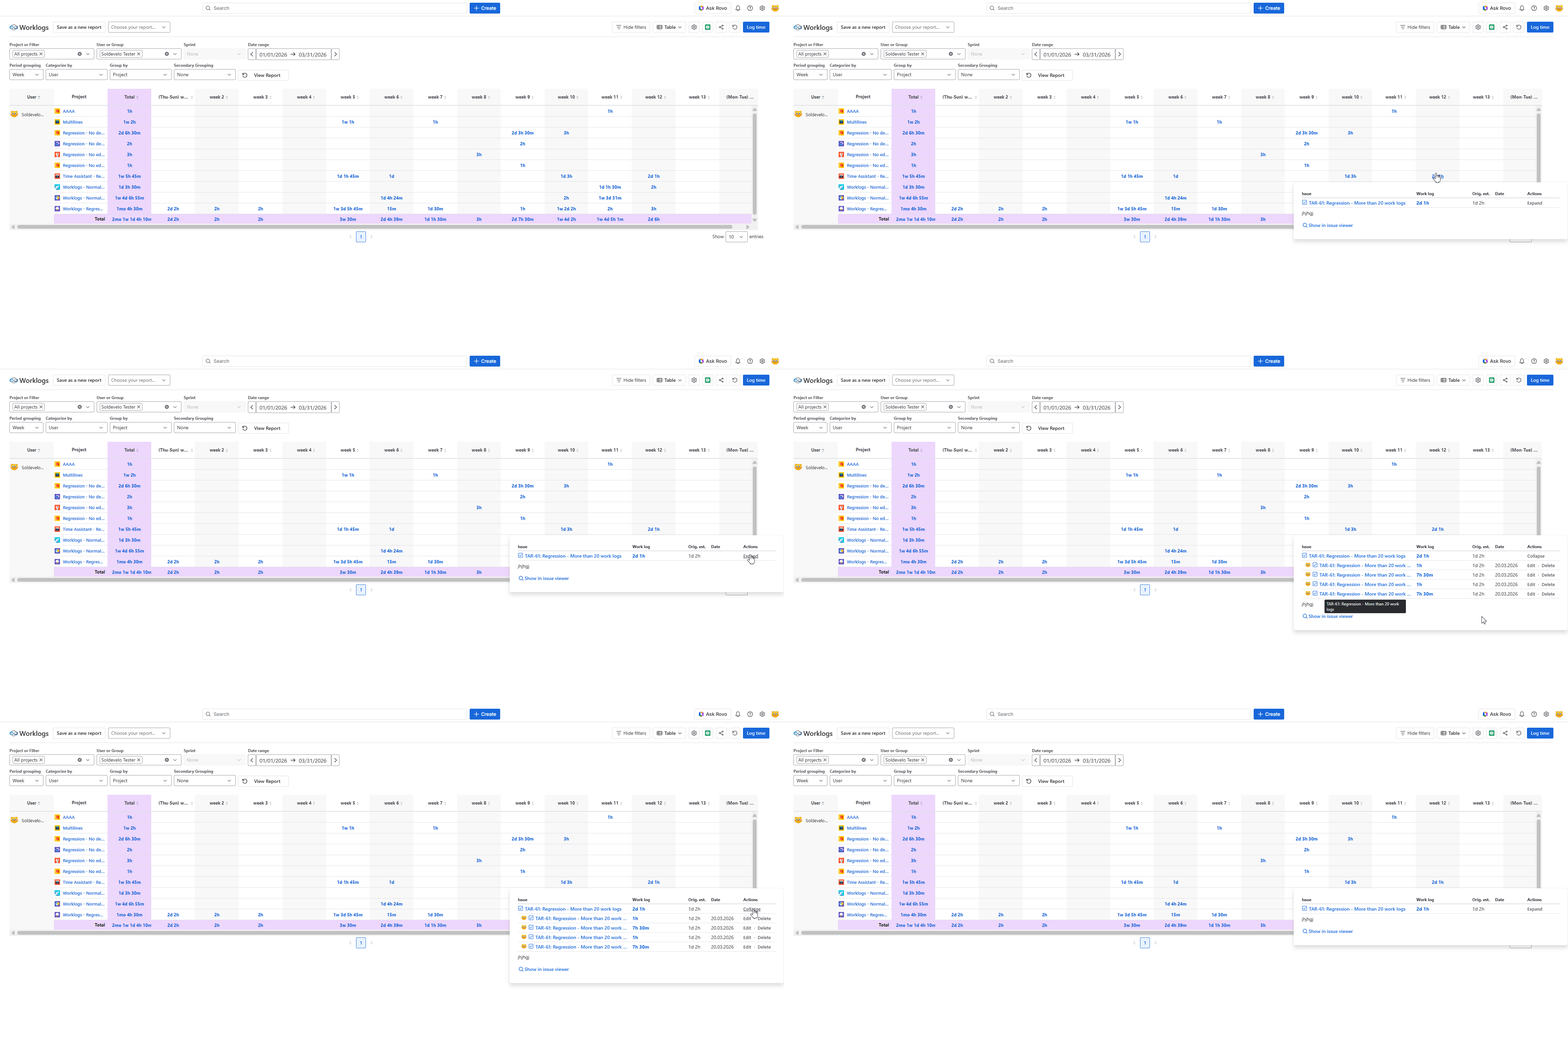
If multiple worklog entries are combined into a single cell (e.g., due to weekly/monthly grouping or multiple logs on the same day), use the Expand/Collapse action to view individual entries.
Each sub‑worklog is then shown as a separate row with its own Edit/Delete actions and clear information about which work item or sub‑task it belongs to.
DC
In order to get a list of all the time entries that contribute to the time displayed in any cell in the Worklogs table, click on the particular time. This will show a list of all issues, together with their work log and the original estimate.
Editing and deleting logged time
Please keep in mind that these options are only available if you have the "Edit own worklogs" and "Delete own worklogs" permissions enabled in a given project.
Cloud
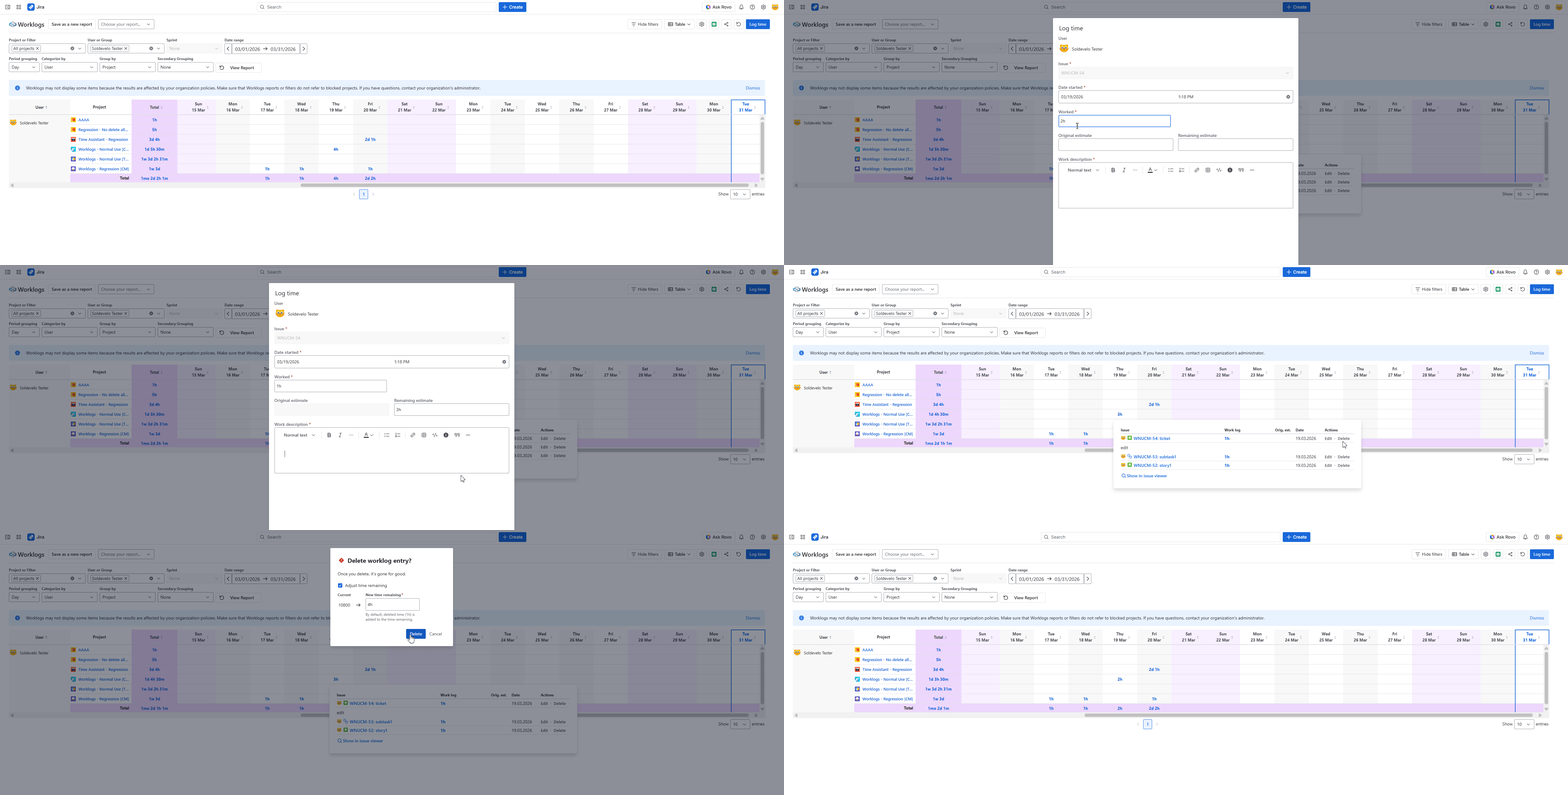
Cloud users can manage worklogs directly from the Worklogs report, without opening the Jira work item.
When you click a time value in the report, a worklog details pop-over appears. For each entry, you’ll see an Actions column with Edit and Delete buttons (or icons), the Date of the entry, and the avatar of the user who logged the time.
-
Edit: Opens the Worklogs Log time modal, allowing you to update and save changes to the specific entry.
-
Delete: Opens a confirmation dialog. Once confirmed, the entry is removed from both the report and the Jira work item.
DC
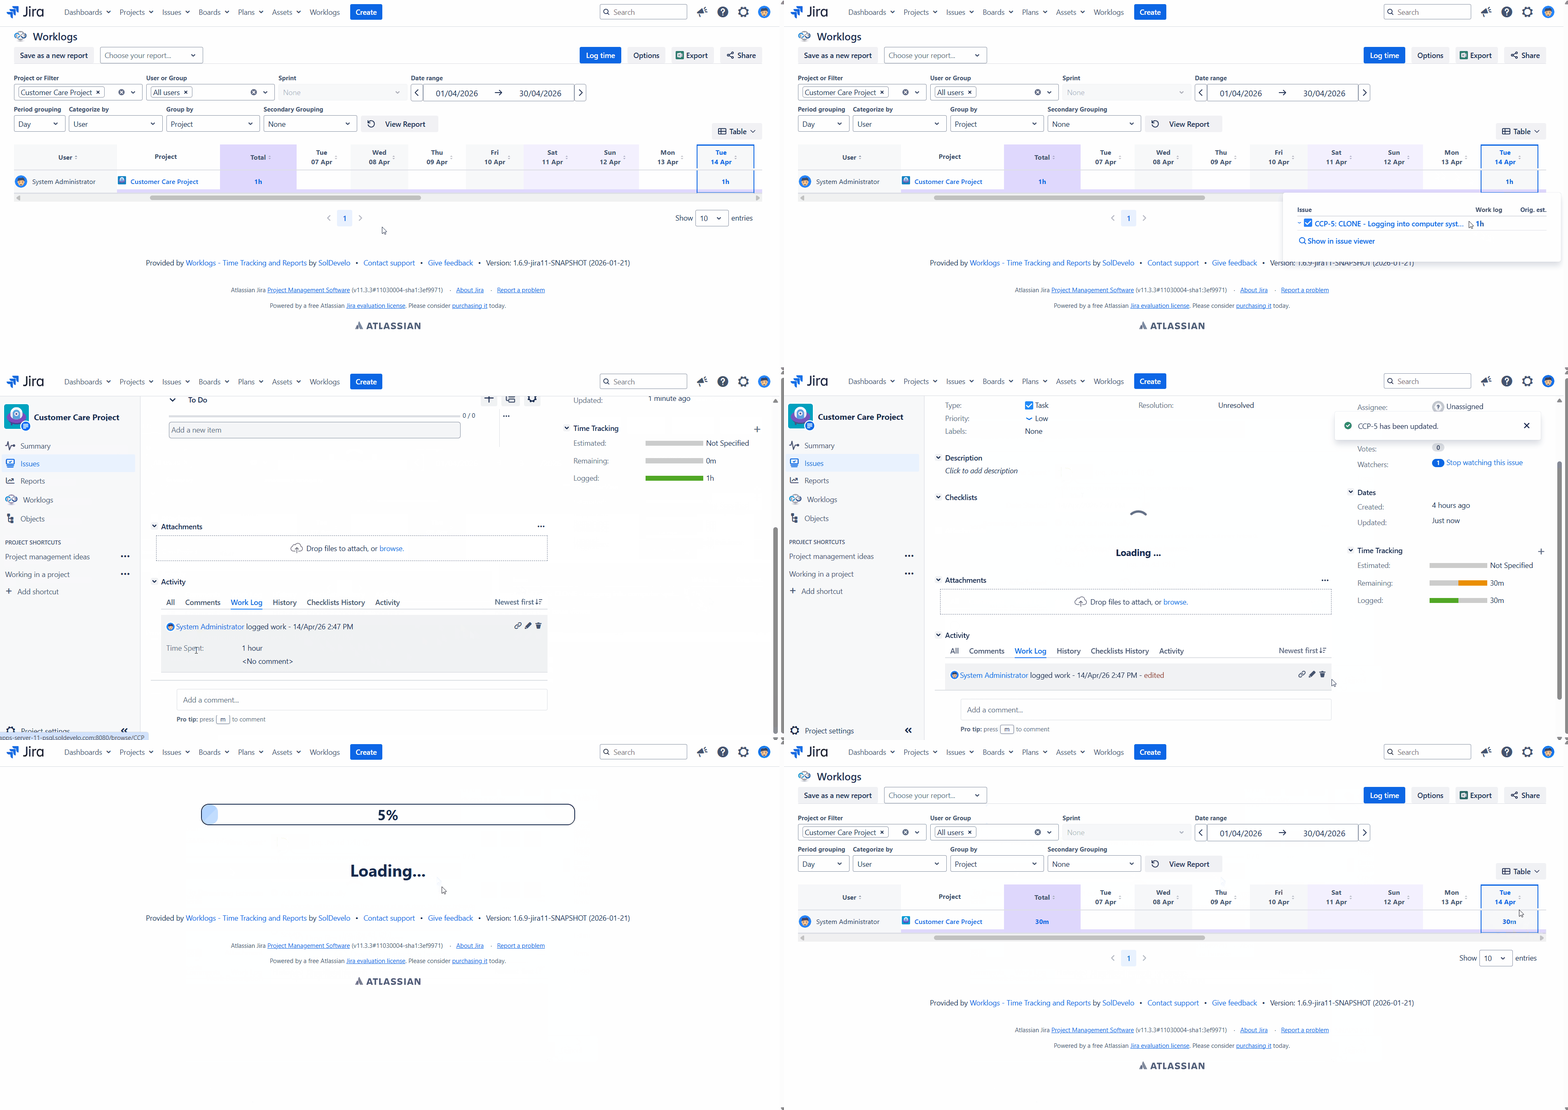
In DC, you can edit or delete a worklog in the work item view, where you'll be redirected by clicking the worklog in the report. To do it:
-
Find the entry you wish to change in the time log table.
-
Click on the time value for that entry.
-
You will be automatically redirected to the Jira ticket view, where your selected log will be highlighted.
-
From there, simply select Delete to remove the entry or Edit the values as needed.
Do you have any questions or feedback? Feel free to contact us here 💡