
Integrating the Worklogs gadget into your Jira dashboard allows you to monitor time-tracking data at a glance, providing immediate visibility into team productivity and project progress without leaving your main view. By following this guide, you will learn how to add the gadget to your dashboard and customize its configuration settings, ensuring your dashboard displays the exact insights you need.
Adding Worklogs gadget to your dashboard
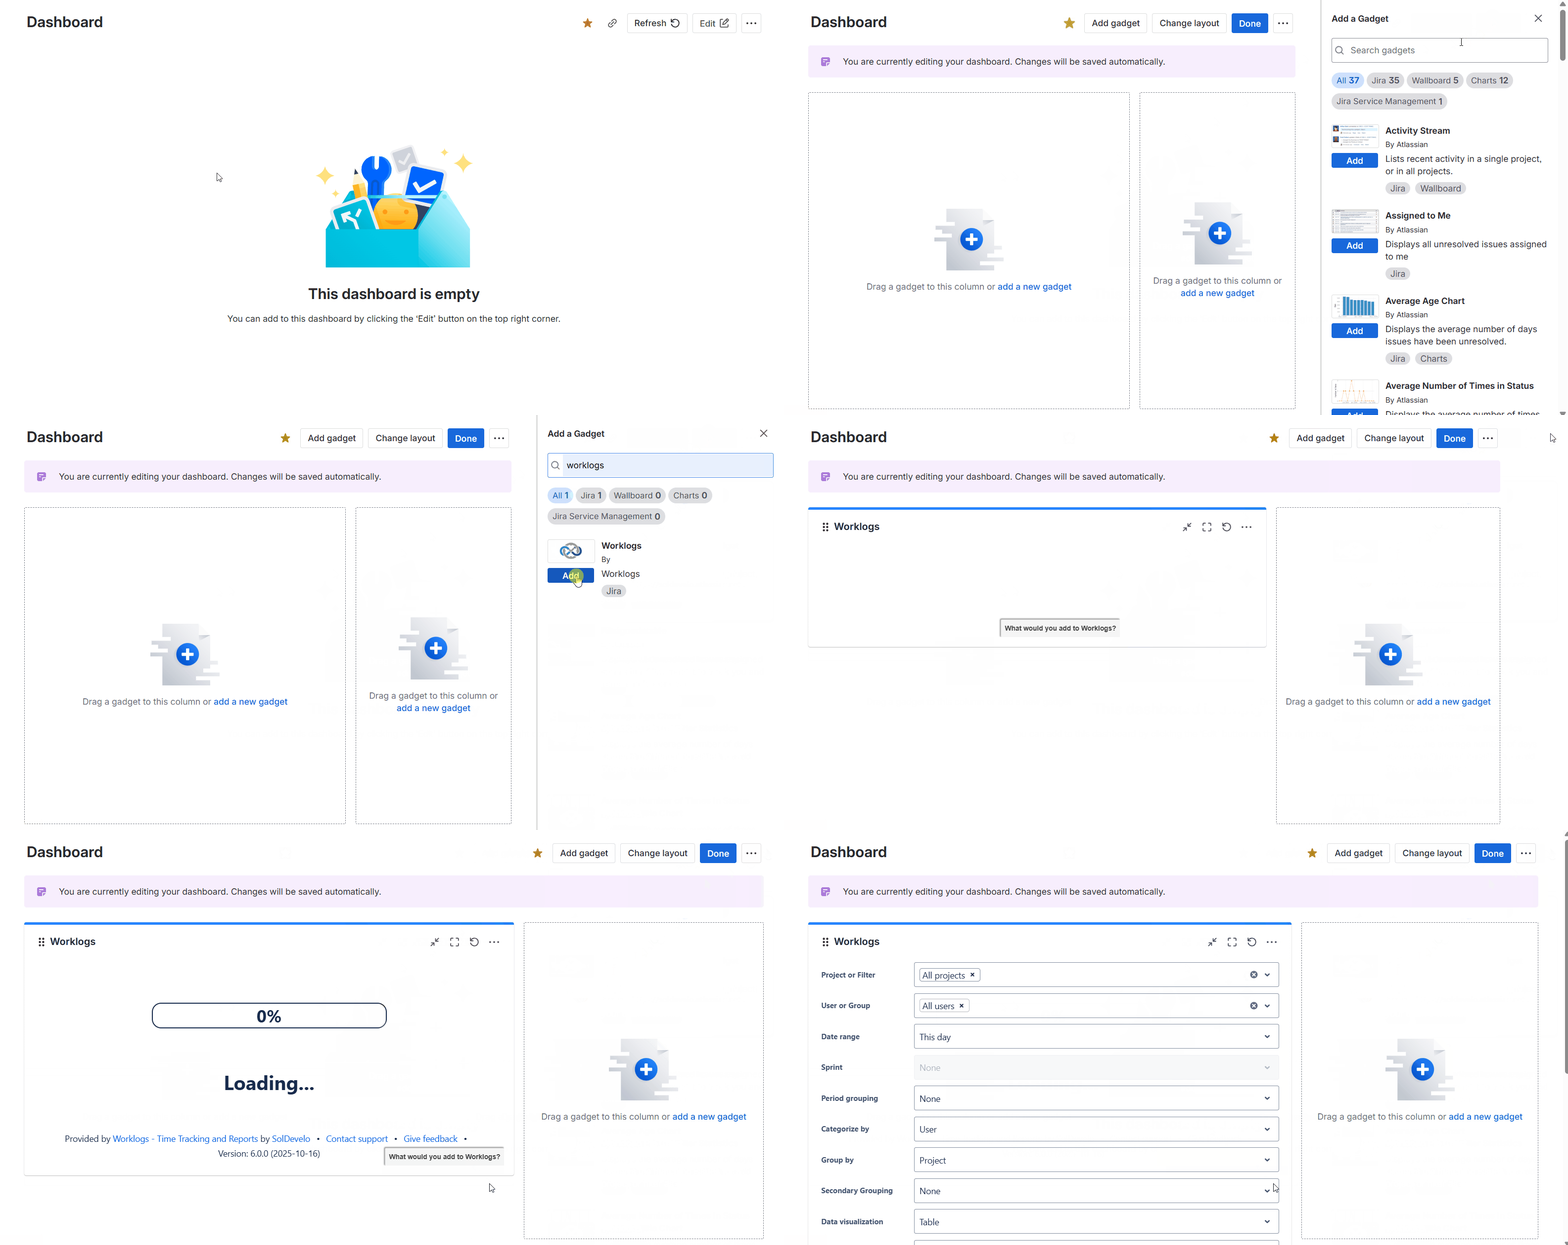
In order to add Worklogs gadget to your dashboard, click Edit on the right side of your dashboard and search for Worklogs from the provided list. Then, click Add and close the dialog window. Please note that you must be the dashboard’s owner to add gadgets to it.
Worklogs gadget configuration
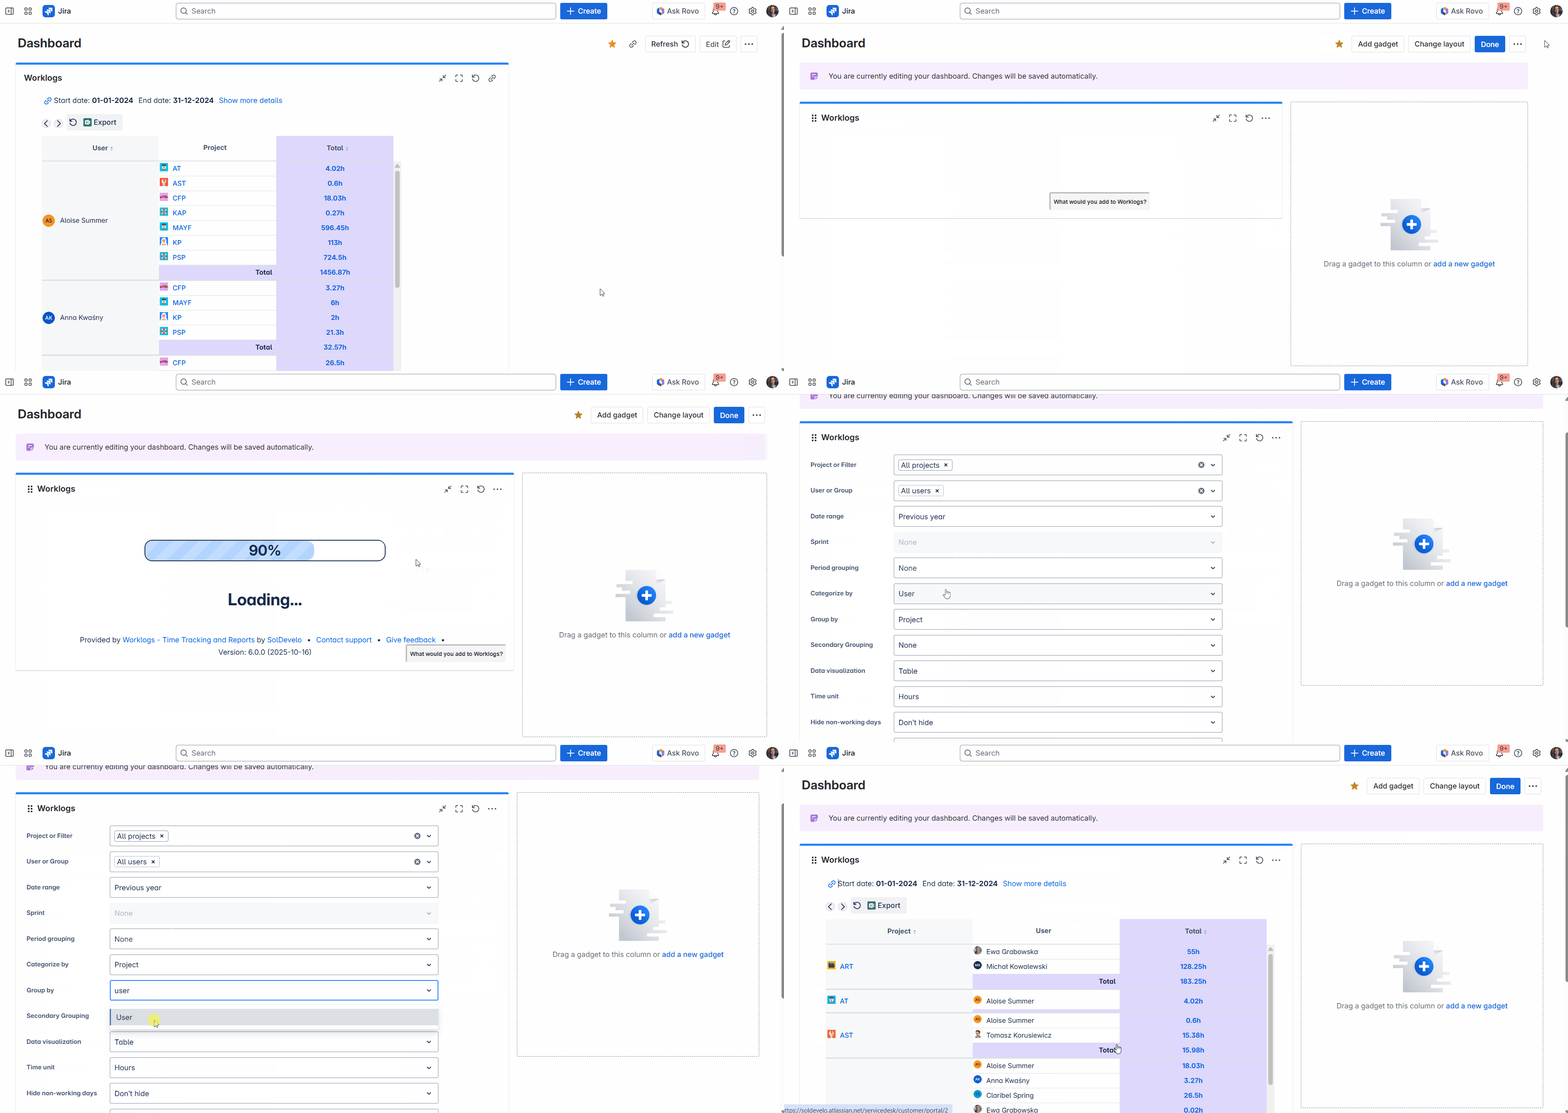
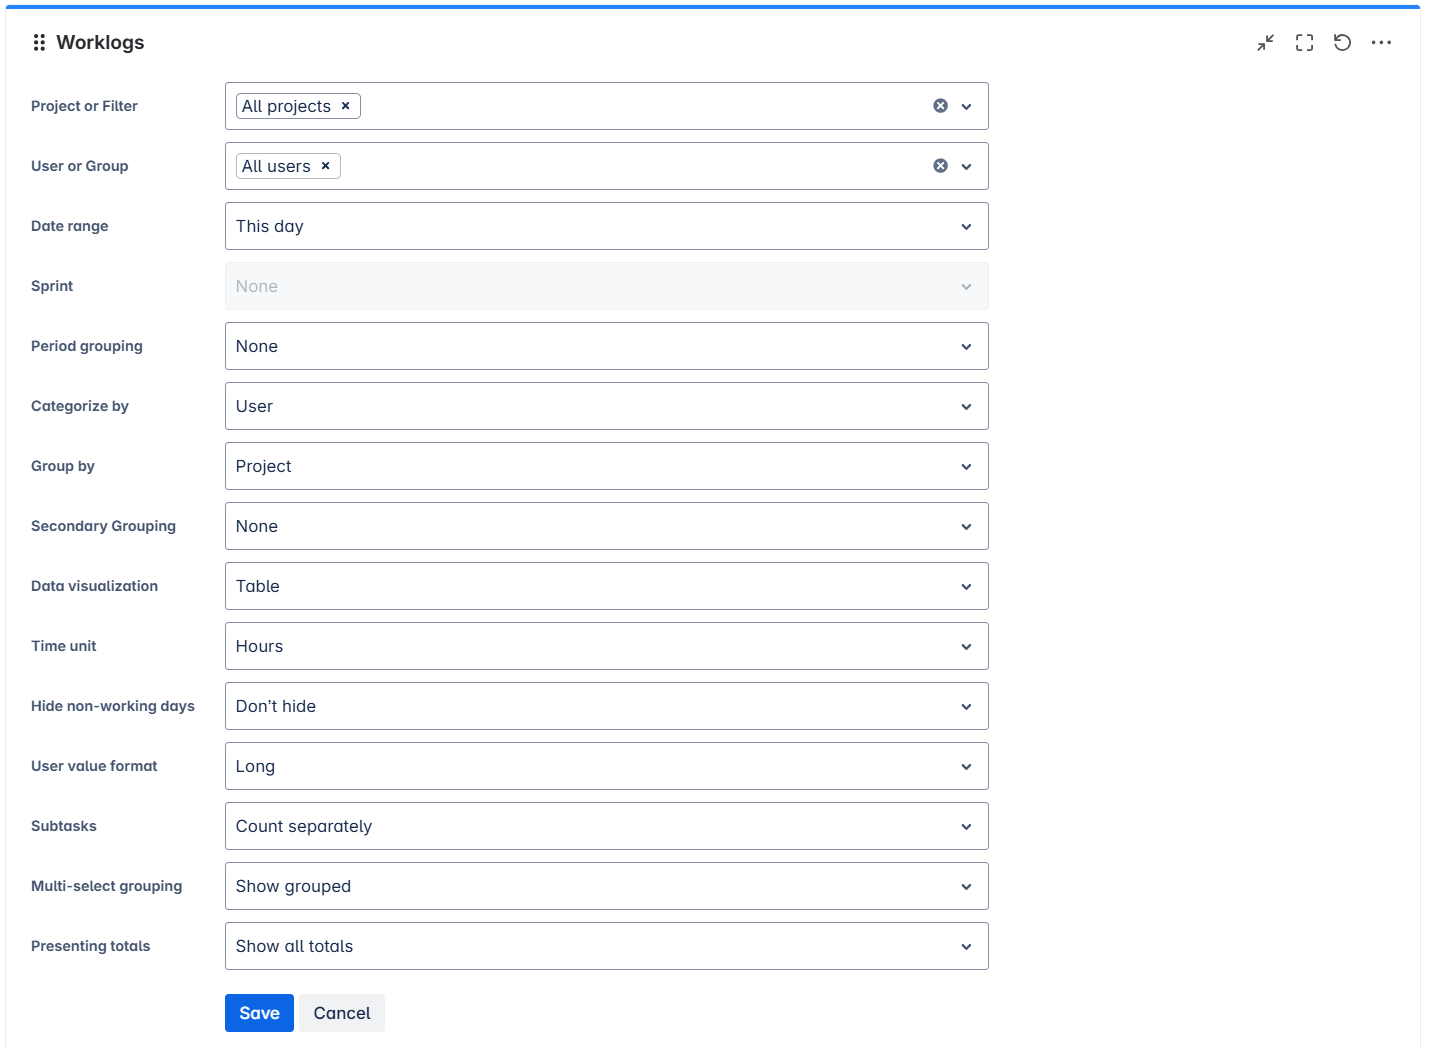
To configure the Worklogs gadget click on click Edit on the right side of your dashboard. Then go to the gadget's menu and select Configure. This will open an edition view with options to choose from. Set the desired configuration for optimal gadget usage and click Save.
Do you have any questions or feedback? Feel free to contact us here 💡