.png)
This section contains information about:
For a quick walkthrough of this feature, watch the video below 📽️.
What are the “attributes”
Worklogs attributes let you add extra custom information to each time entry (work log), so you can later filter, group, and export reports with more context (for example: Billable vs Non‑billable, Customer, Overtime/Overhours, Work Type, etc.).
Attributes are part of the enhanced logging experience. To leverage these features, ensure Worklogs is set as your Jira Time Tracking Provider. (See: Worklogs Time Tracking Provider)
Why use attributes?
Attributes help teams standardize how time is logged and reported:
-
Billing and invoicing: track billable vs non‑billable work
-
Customer/client reporting: assign time to a customer or contract
-
Policy tracking: mark overtime/overhours or special categories
-
Operational analytics: report by work type (Dev/QA/PM), initiative, cost center, etc.
Configure attributes (Admin)
Once the Worklogs Time Tracking Provider is enabled, you can define which attributes users will use for their daily logs. To do so, Admin must navigate to the App Configuration and select the Attributes section:
-
Open Jira side panel → Apps
-
Find Worklogs and open Worklogs app settings (⋯) → Attributes
-
Go to Attributes
In this section, you will see the Add attribute button and a list of already created attributes.
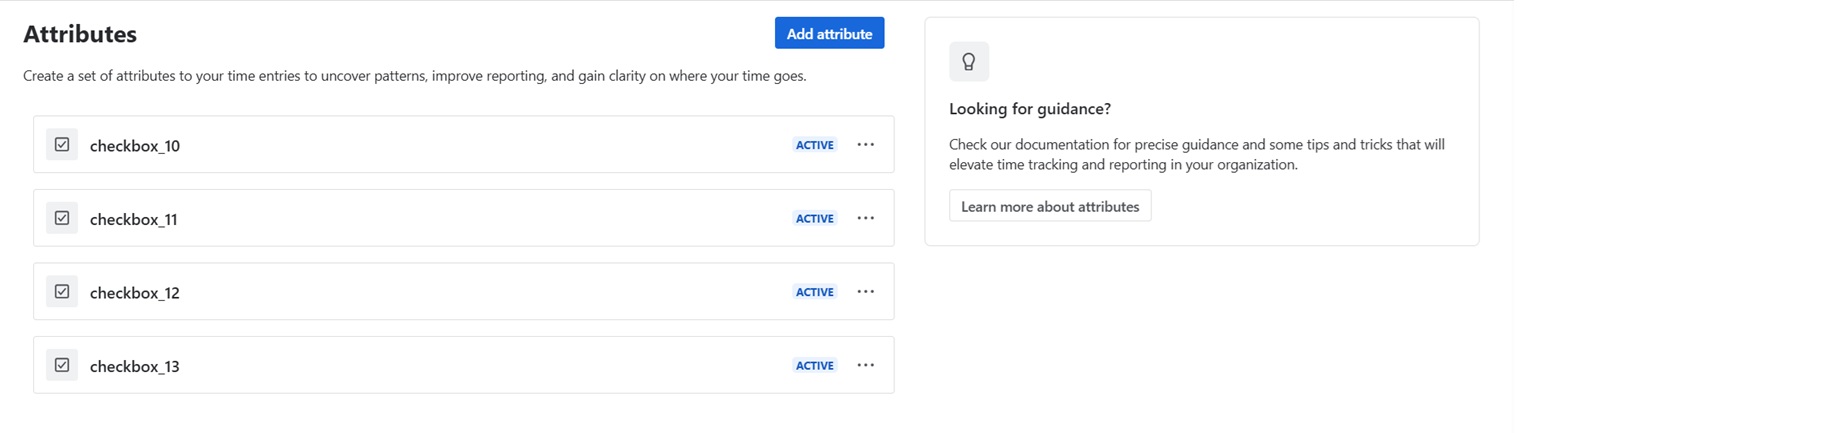
-
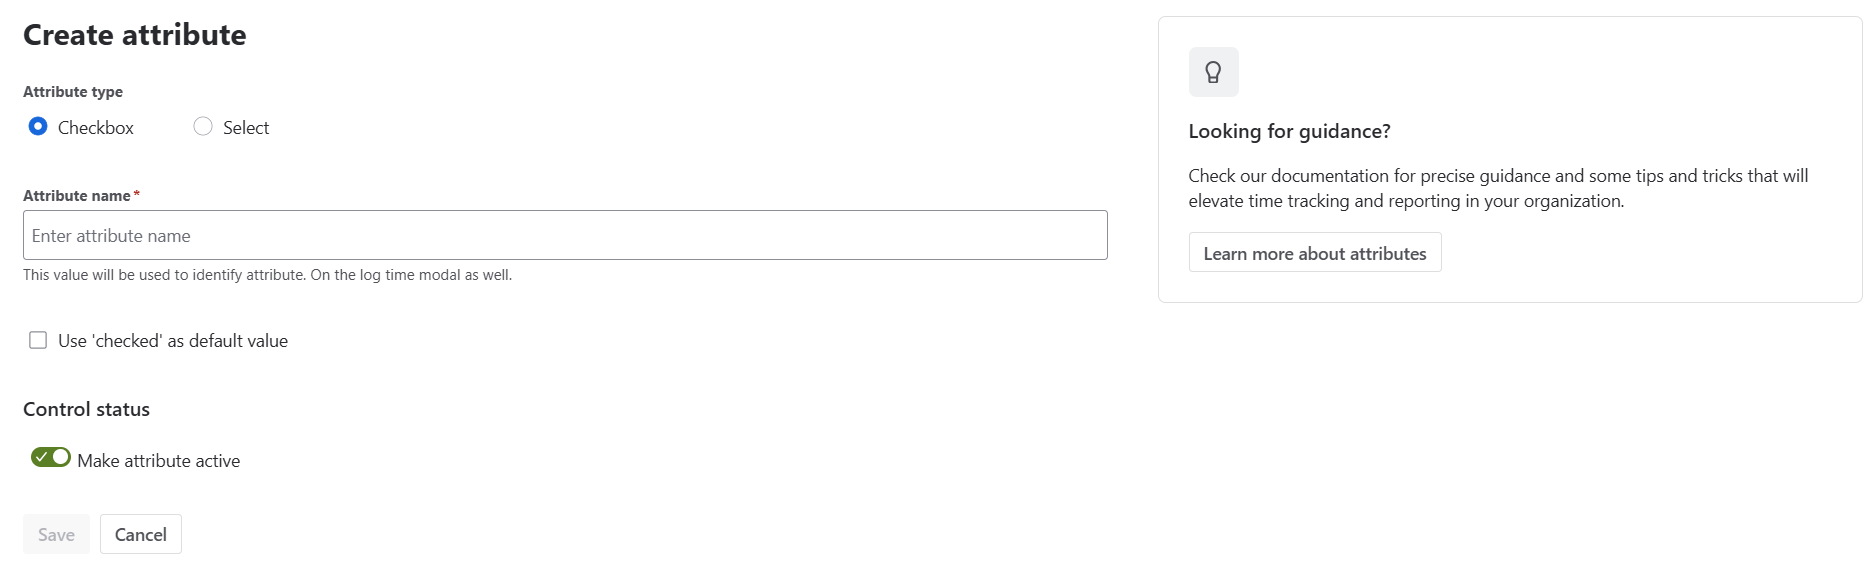
Click Create attribute, and define a custom one:
-
Name (example: Billable status)
-
Type (for example: single or multi select/checkbox)
-
Values (if applicable, example: Billable, Non-billable)
-
Required (if you want to enforce completion during logging)
-
You can also decide whether the attribute should be active immediately or remain inactive until you add it to the log-time modal.
-
-
Save.
The result: Configured attributes are available in the Log time modal (for new worklogs).
Logging time with attributes (extension)
Attributes extend the standard “Logging time” flow: users still click the same Jira action to log work, but when Worklogs Time Tracking Provider is enabled, they see the enhanced Log Time modal with activated features.
Where users will see attributes
Once attributes are configured and the provider is enabled, they will appear in a unified Log Time modal, consistent across both Jira and the Worklogs app:
-
In the work item (issue) view, when the user selects Log work
-
When logging time from within Worklogs modules (where applicable)
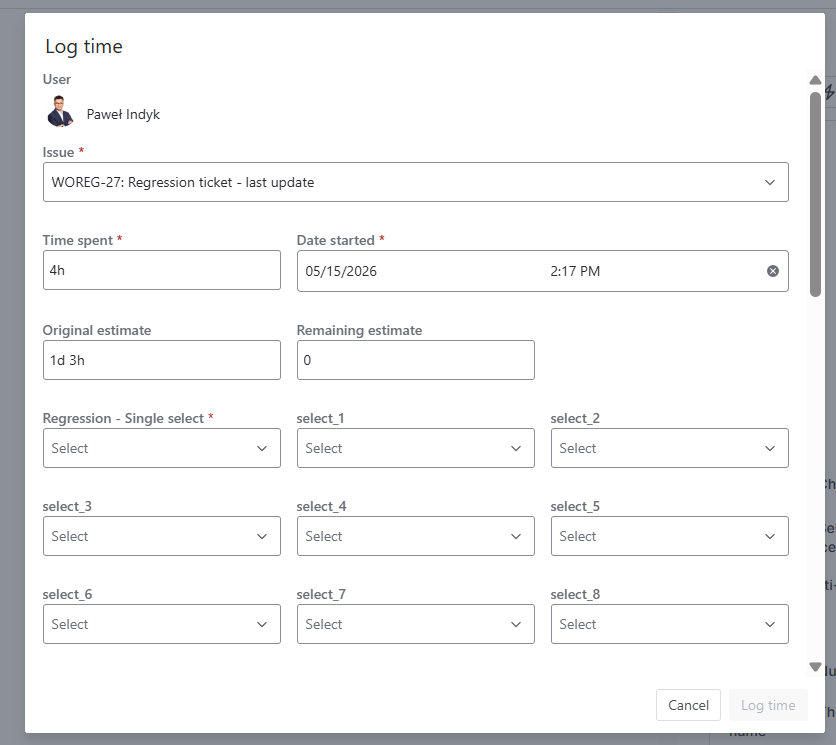
How to log time with attributes
-
Open the work item and click Log work or trigger it on the app level (see:Logging time)
-
Fill in the standard fields (Time Spent, Date/Time, Description - depending on your configuration)
-
Fill in Attributes (e.g., Billable status, Customer, Overhours)
-
Click Log time to save
Required attributes
If an attribute is set to Required, the user must provide a value before the worklog can be saved.
Where attribute data is stored?
All time entries are still stored in Jira work log entry directly on your Jira instance. We do not store it on app backend, but retreving it from Jira storage.
(Aligned with the provider doc statement that “All data is still stored natively within Jira”
Worklogs Time Tracking Provider).
Reporting on attributes
You can report on attributes using the native Worklogs Report view. Use Filtering and Grouping where you can search for your attributes options to display only the worklogs you’re interested in, and optionally categorize and summarize them to analyze how time is distributed (e.g., by Billable status, Customer, or other attributes). Report structure can be adjusted using categorization and groupings.
For a step-by-step explanation on how to configure filters, grouping, and generate a report, see:
Reporting - Filtering and Grouping.
Export
Attribute-based reports can be exported using the standard export flow in the Report view (the same way as other Worklogs reports), see Export.