
Reports are a convenient way to quickly generate a view with a filter configuration that you often come back to. You can:
Save a report
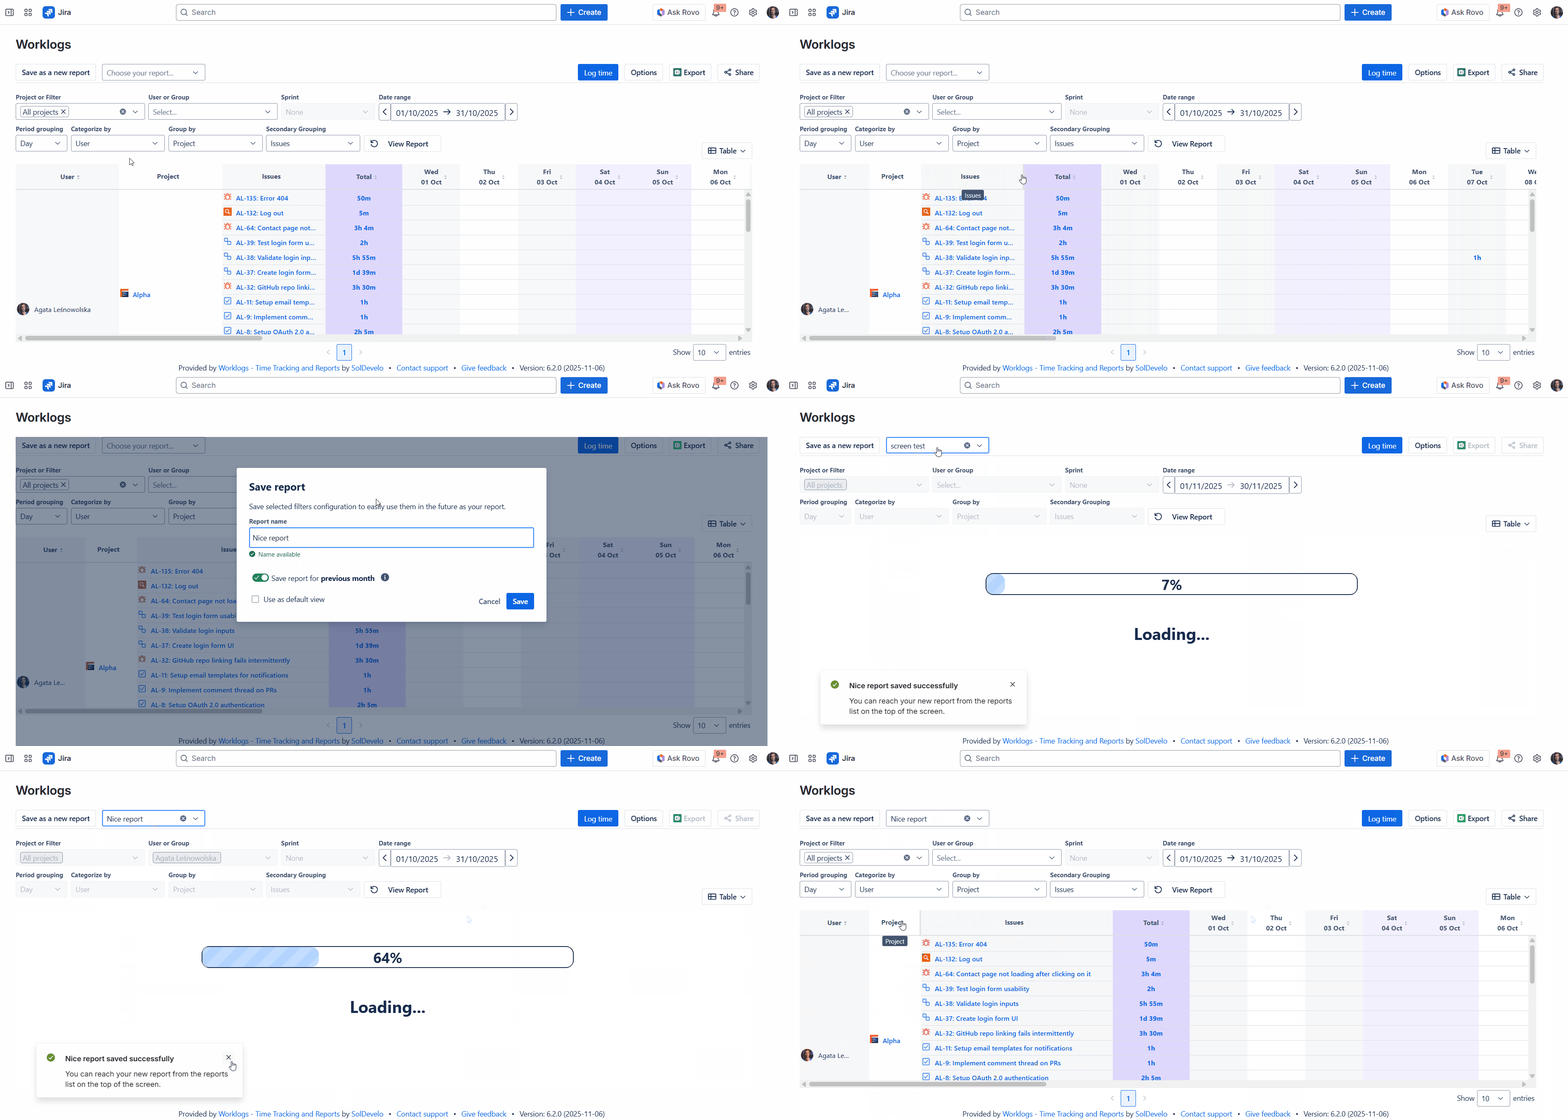
In order to create a new report:
-
Select your desired filters.
-
Click the Save as a new report button.
-
Type in the Name of your report.
-
Hit Save.
-
Access your report anytime from the drop-down menu.
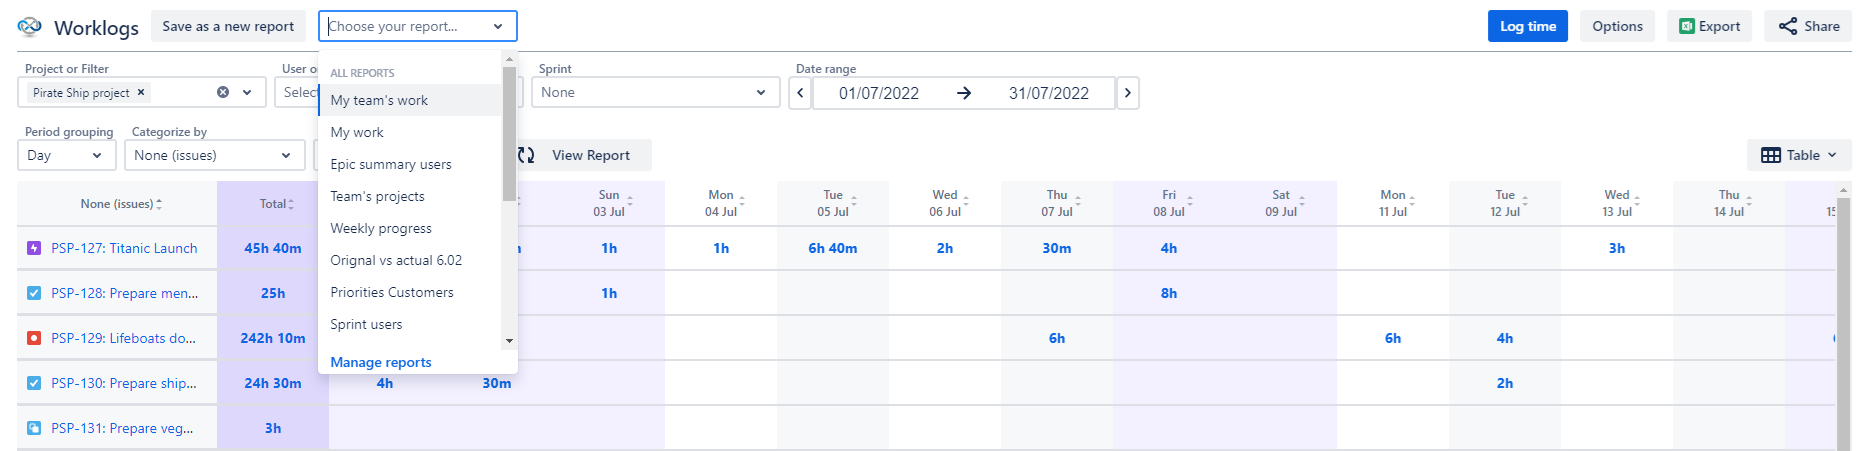
Saved reports are for individual users and are visible only to their creators. However, there’s an option to share and export your Worklogs data.
Save a report with a date range
You can save a report with a specific date range. The date range can be set by selecting the starting and the ending day on the calendar. You can also choose one of the suggestions: today, current week, current month, current quarter, current year, previous week, previous month, previous 3 months, or previous quarter.
Let’s say you want to save a report that displays the previous month.
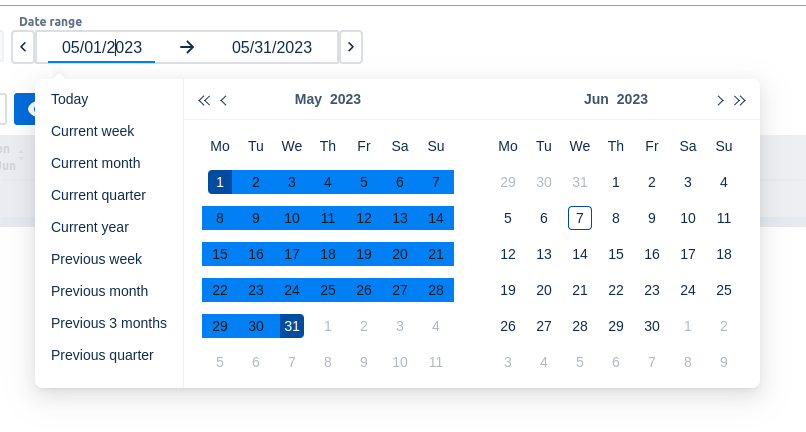
Choose the previous month date range, click Save as a new report and toggle ‘Save report for previous month’:
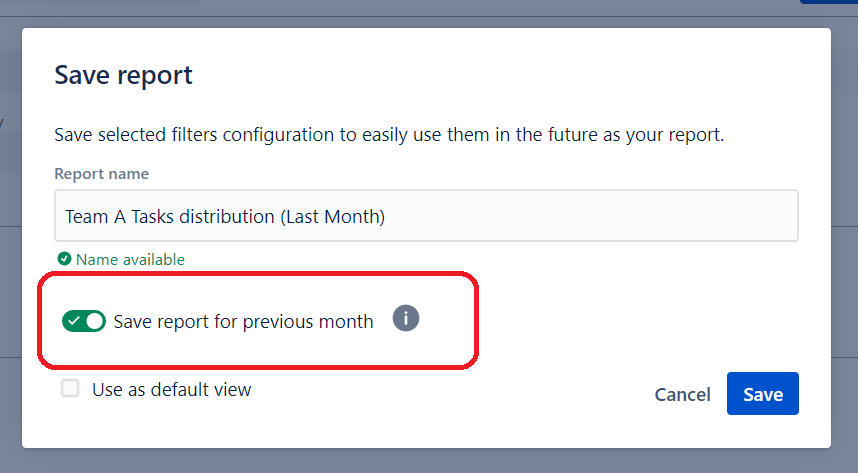
Now, your report will dynamically update the date range to always fit the previous month so that you don’t need to change it manually. If you choose another date range, for example current week, the app will adjust, and update accordingly.
To edit the existing reports and add a date range to them, click Save changes and select Save report for (...):
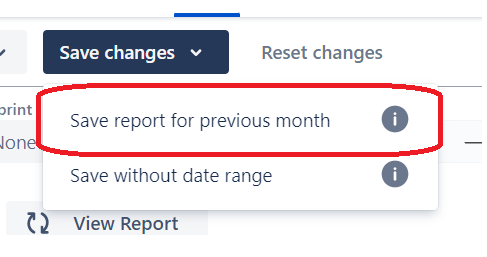
Reports saved without a date range will use the time selected by the user at the moment of loading the report.
Save a report with custom dates
This feature is available only in the Worklogs app page. This feature is unavailable in the Jira dashboard gadget.
You can also save a report with a custom date range. For example, if you would like to check time reports for the financial period that ends in the middle of the month, you need to go to the calendar and select the starting and the ending day.
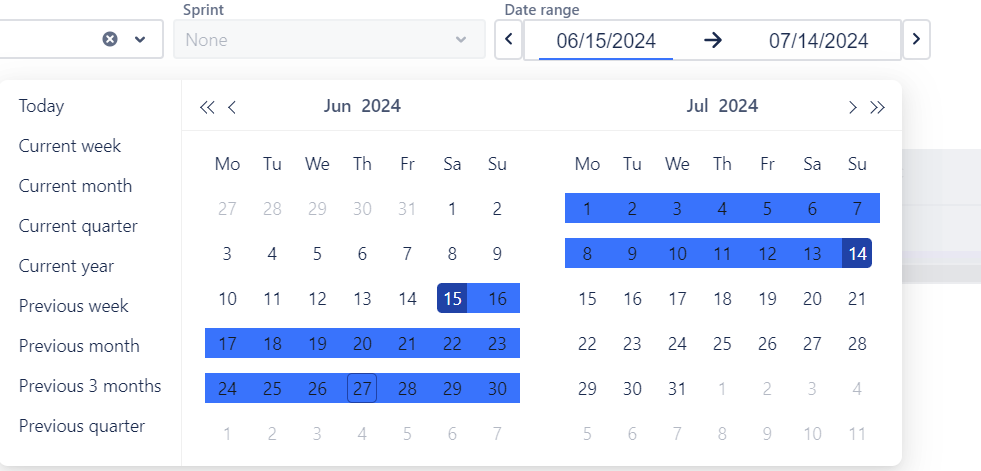
Whenever dates won’t match predefined periods that are located on the left-hand side of the calendar (current week, month, year, etc.), your report will be saved with custom dates.
To confirm saving, click on “Save as a new report” button, and then in the ‘Save report’ modal you will see a toggle confirmation that custom dates will be saved. If you decide not to add custom dates to your report, toggle this option off.
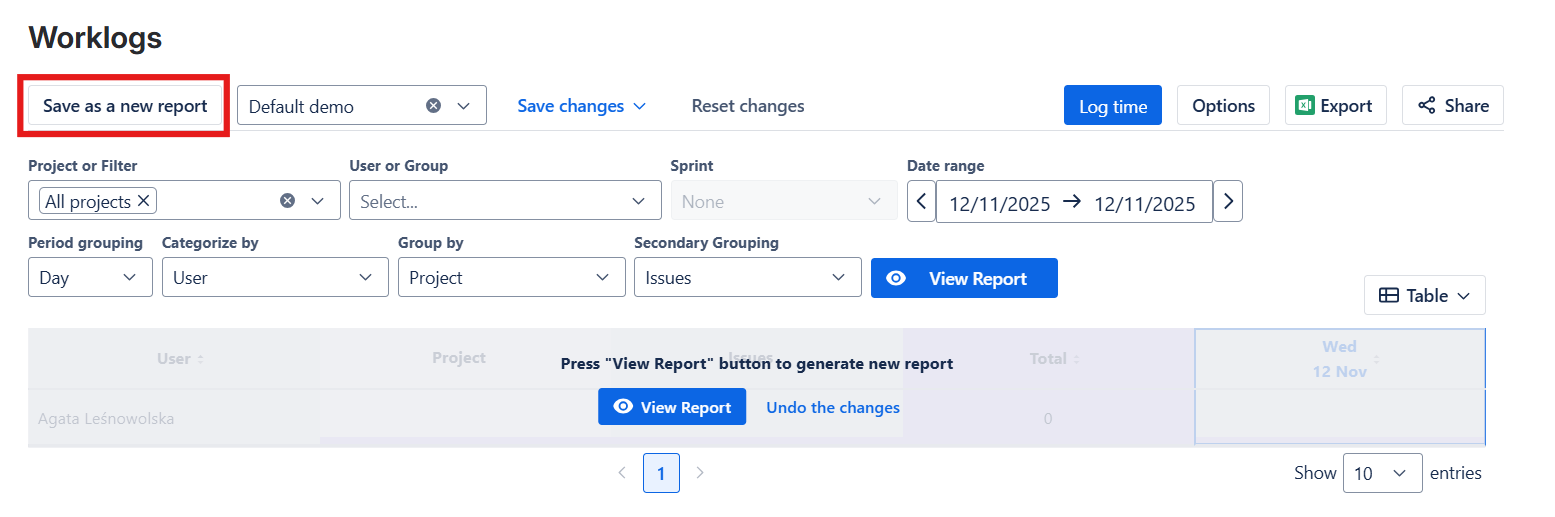
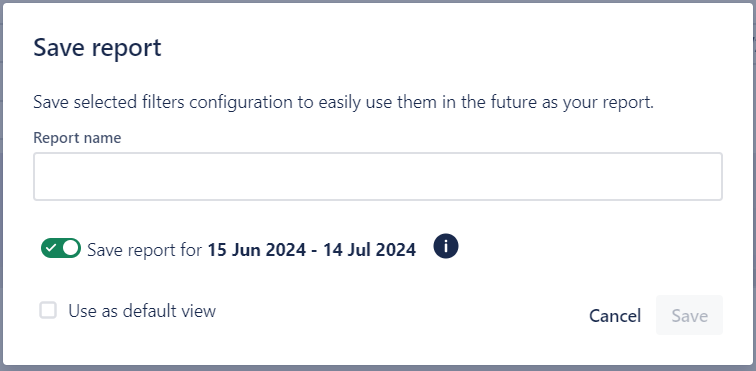
Once you’ve saved your report with custom dates, the selected date range will be loaded each time for this report. You can find this information in the “Manage Worklogs Reports” section.

Custom dates can be modified for already saved reports. To do so, navigate to the report of your choice, change the date configuration, and choose whether or not to save the report with custom dates.

Save the column width
To expand columns, hover over the column header, click on the edge and slide to change the column width to the desired size.
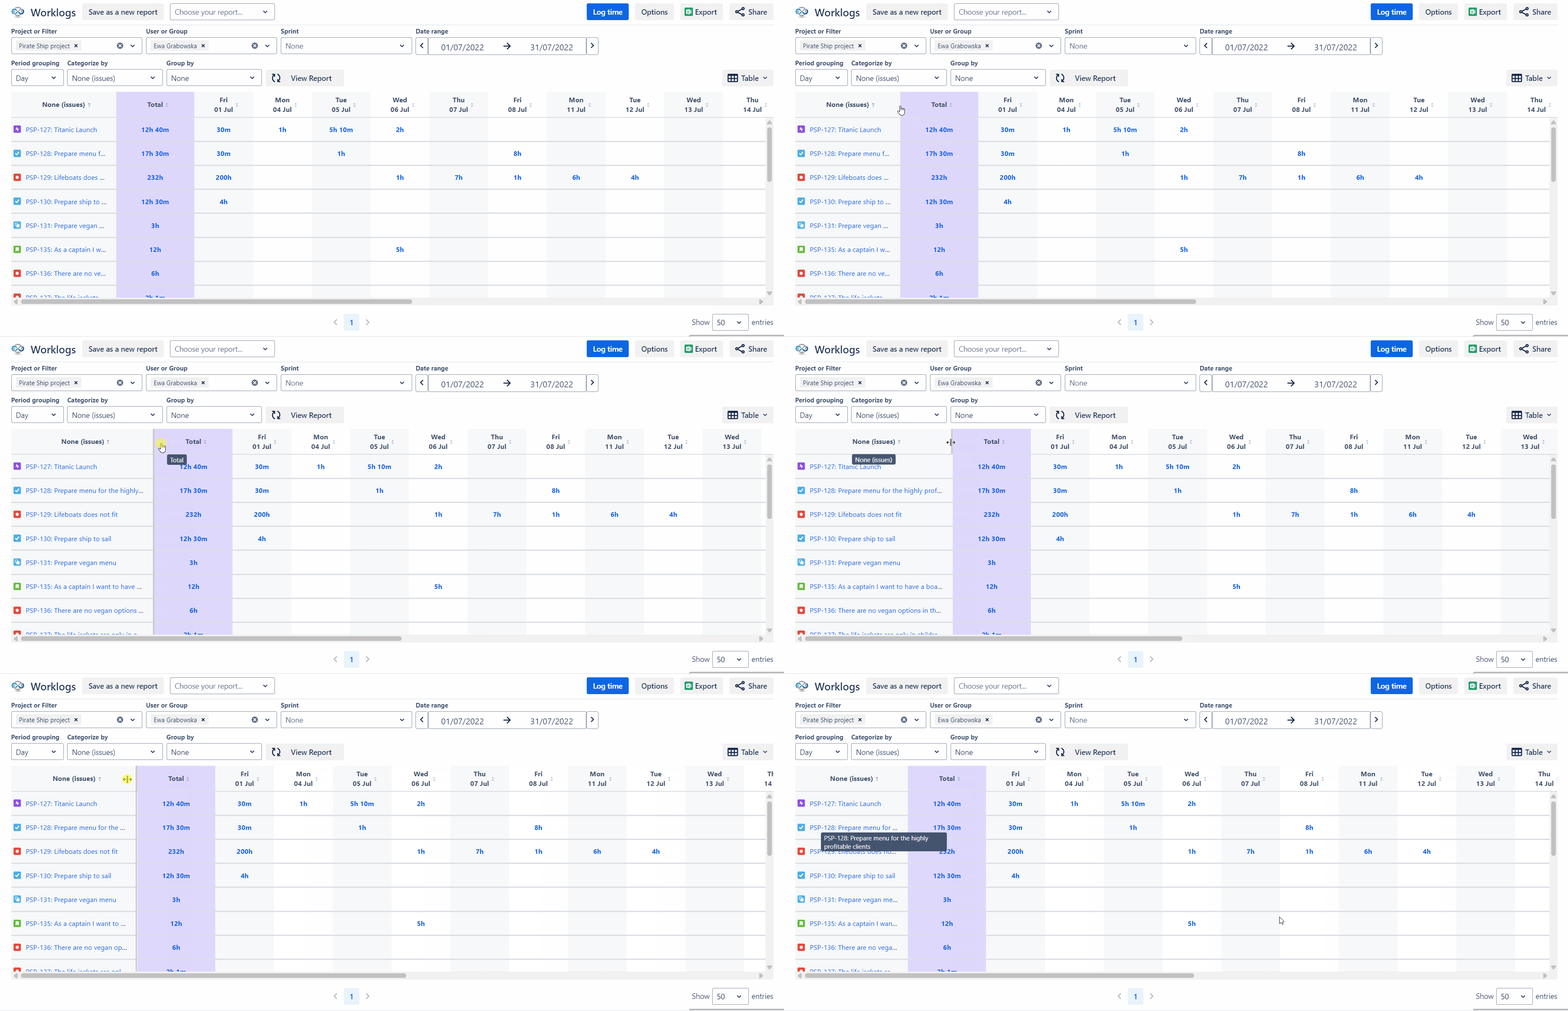
When you save a report, the widths of all resized columns are remembered, ensuring saved reports automatically load with the custom width settings.
Edit saved reports
If you need to edit your report, select it on the Worklogs page and apply changes. Then, click the option to Save changes next to the report’s name.

If you don’t want to save the changes, click Reset changes to go back to the initial report state.
Set a report as your default view
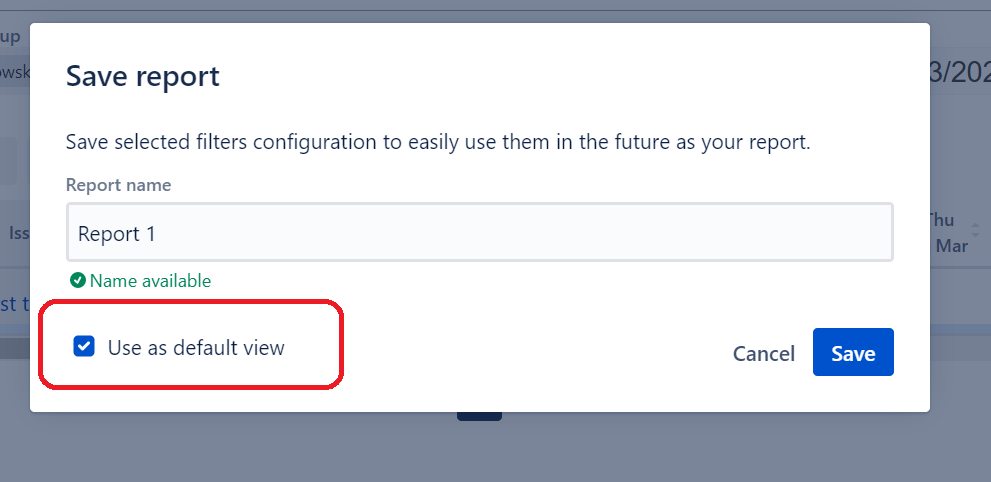
If you often start your work by looking at the same report on the Worklogs page, you can choose the ‘Use as default view’ option. It will load as an initial report every time you open the Worklogs page.
To create a default report, check the ‘Use as default view’ box under the name of your report and click Save.
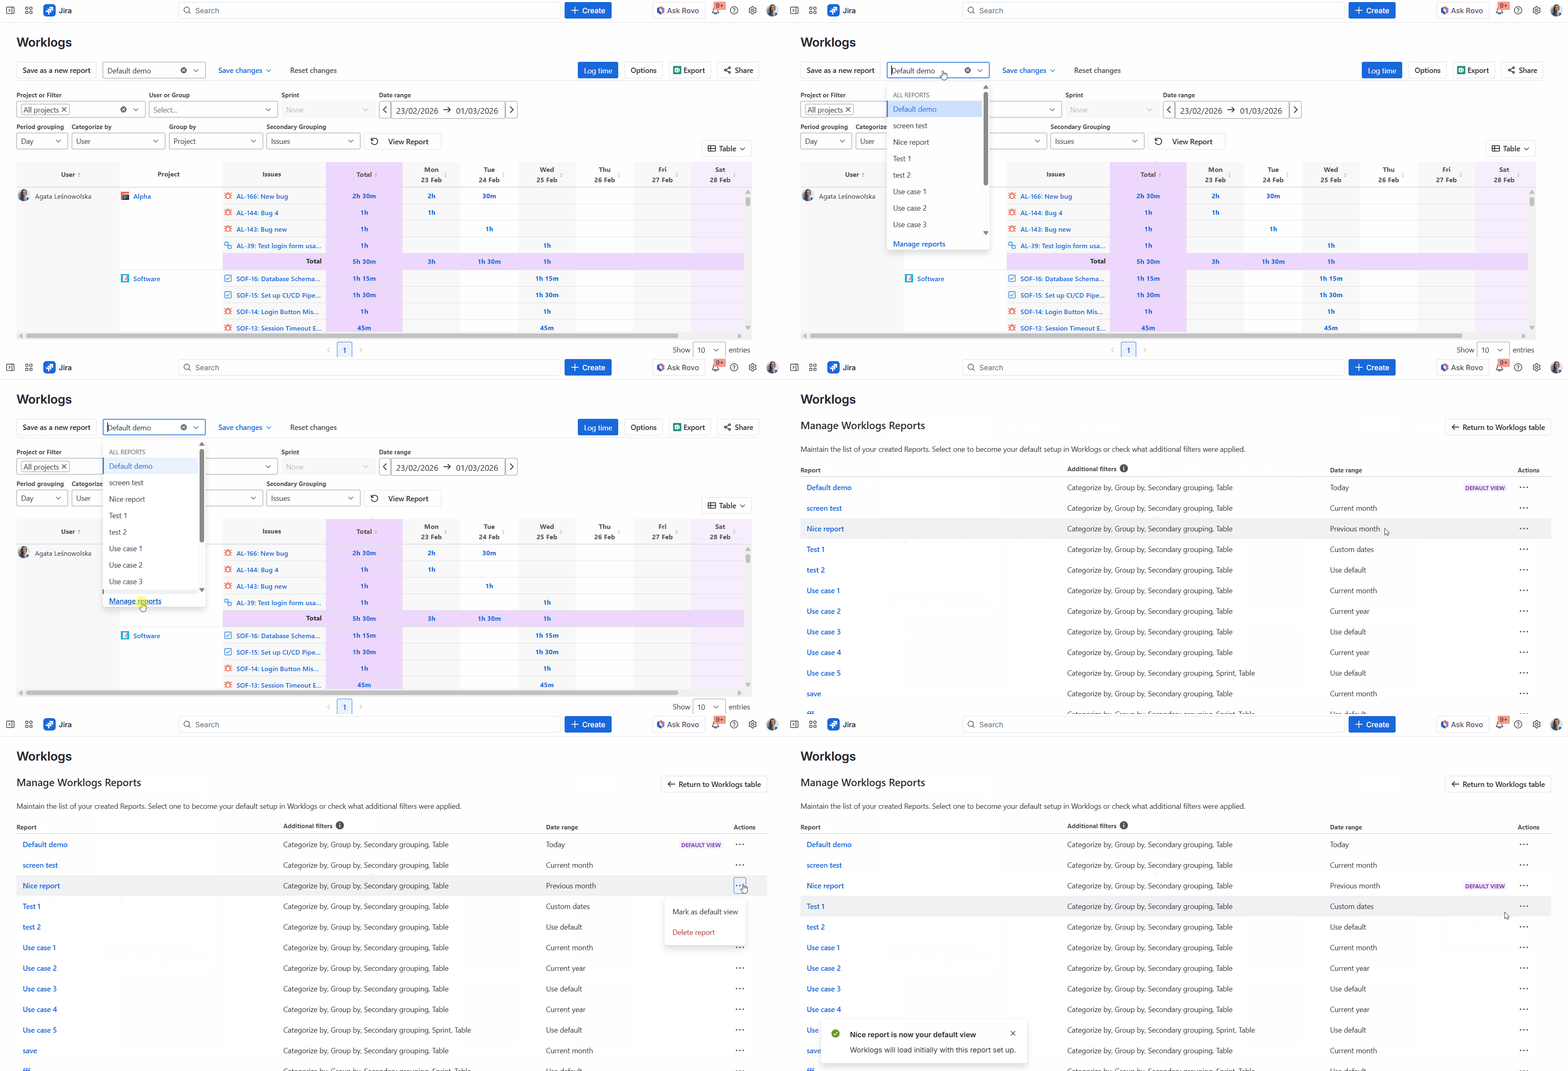
To mark an already existing report as default, go to the ‘Manage reports’ page and click the three-dot menu under the ‘Actions’ column.
Browse your saved reports
To see all yout Worklogs reports:
-
Locate the report dropdown menu at the top left of the Worklogs screen.
-
Click on the dropdown arrow to see your list of saved reports and select the Manage reports option at the bottom.
Here, you can manage all the reports you’ve previously saved. Click the report’s name to go to its page in Worklogs.
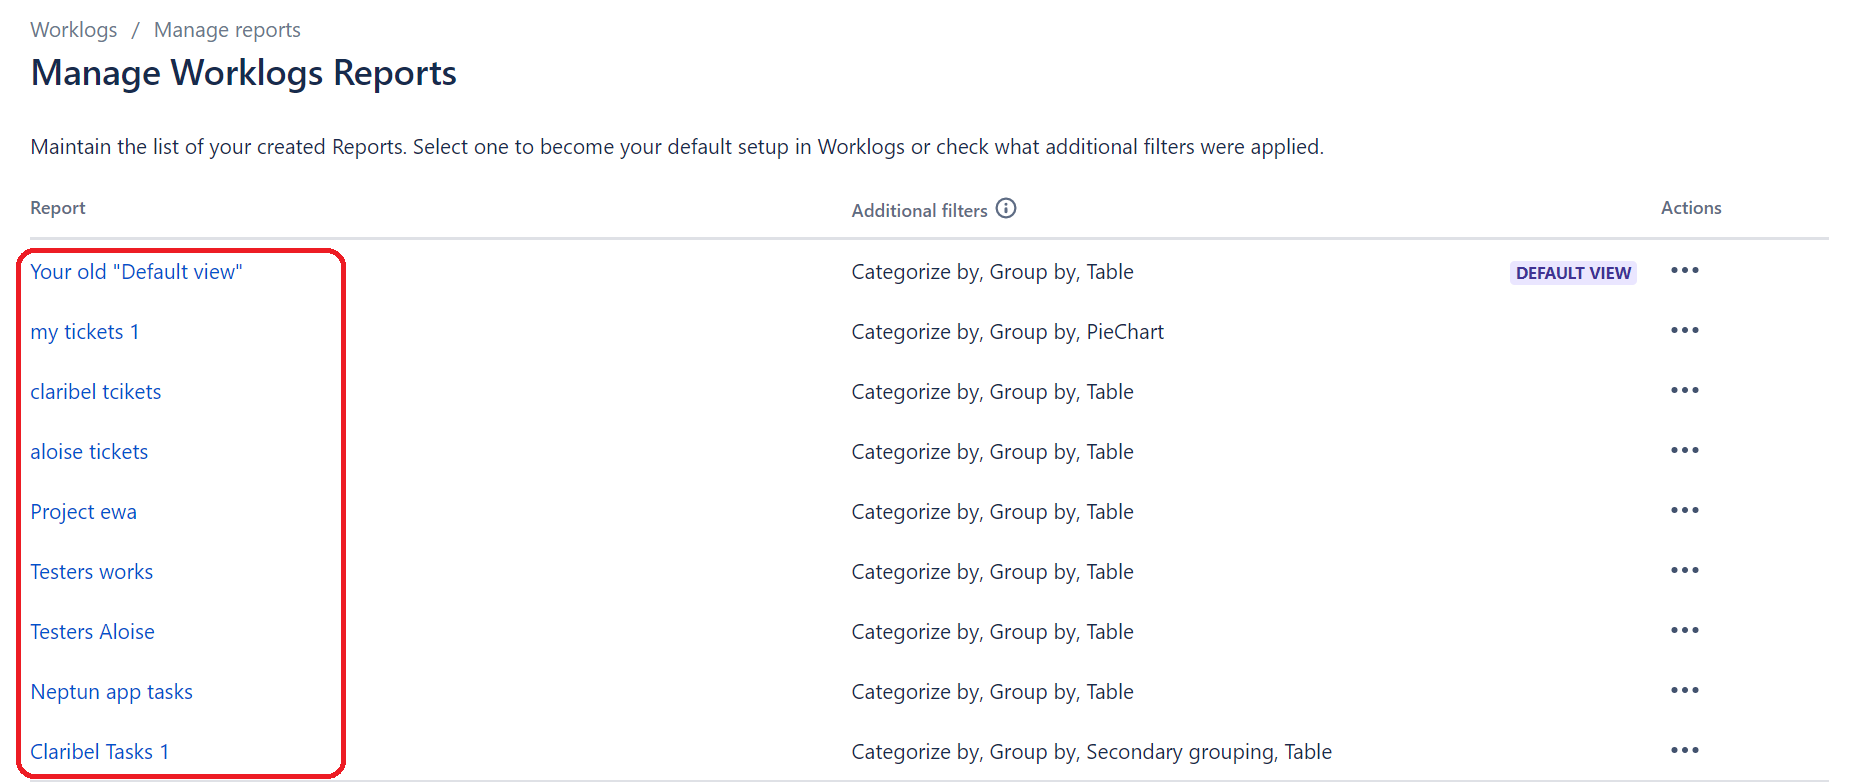
The ‘Additional filters’ column sums up additional filters selected in your report as well as their visual form (table or chart). Filters that are always selected, such as users, projects, and period grouping are not shown.
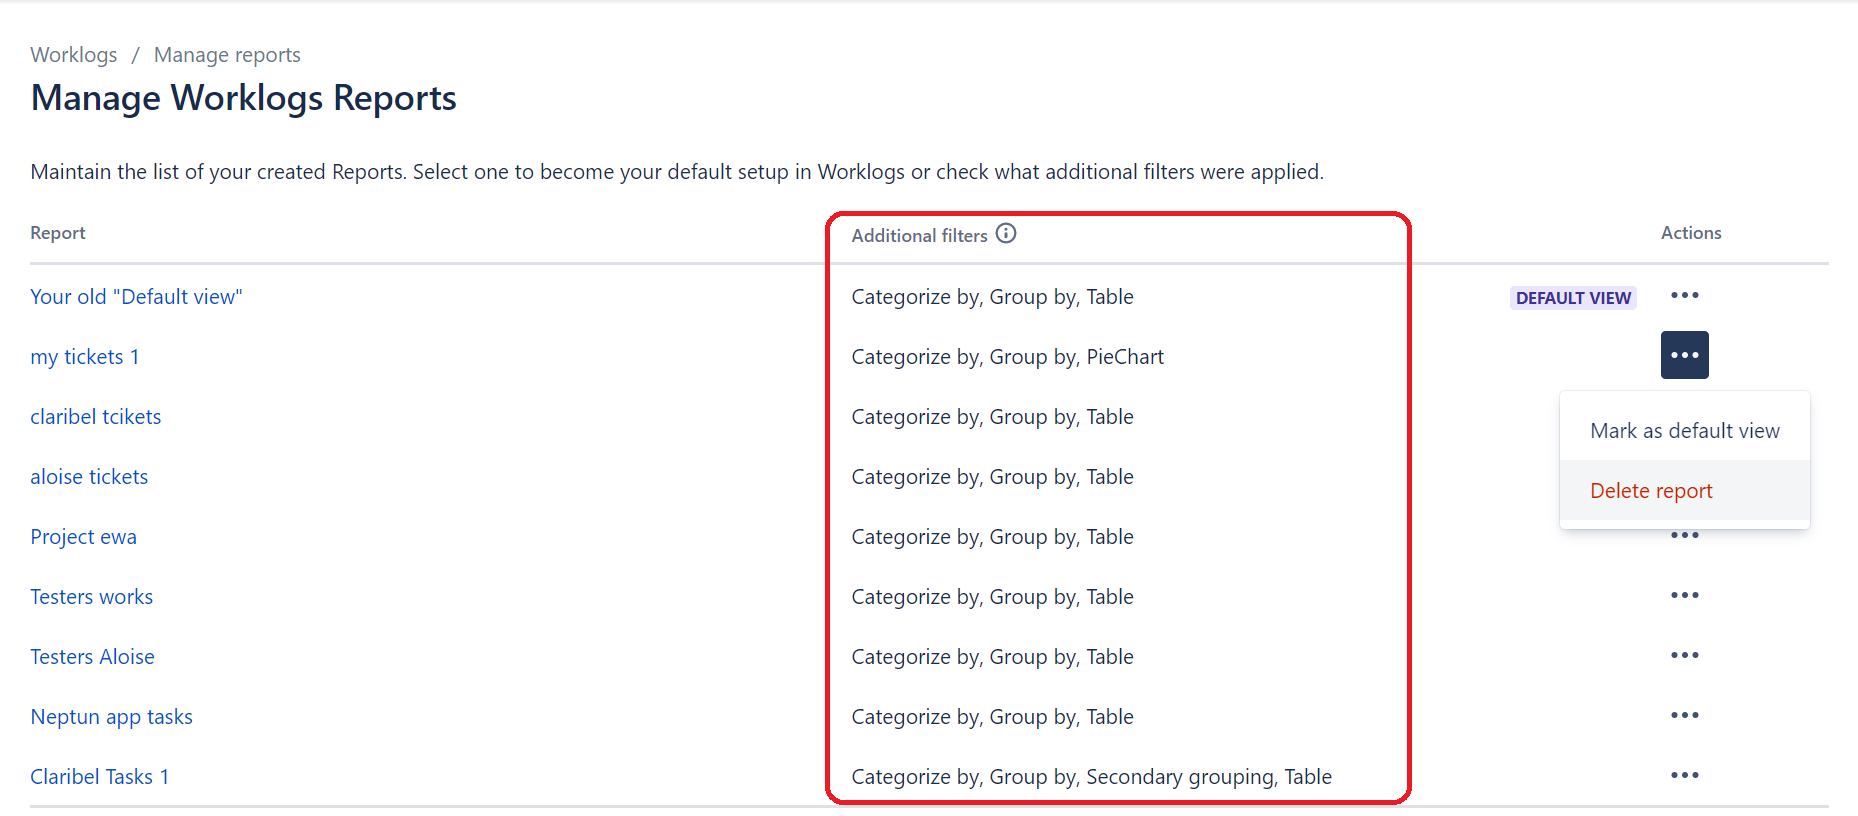
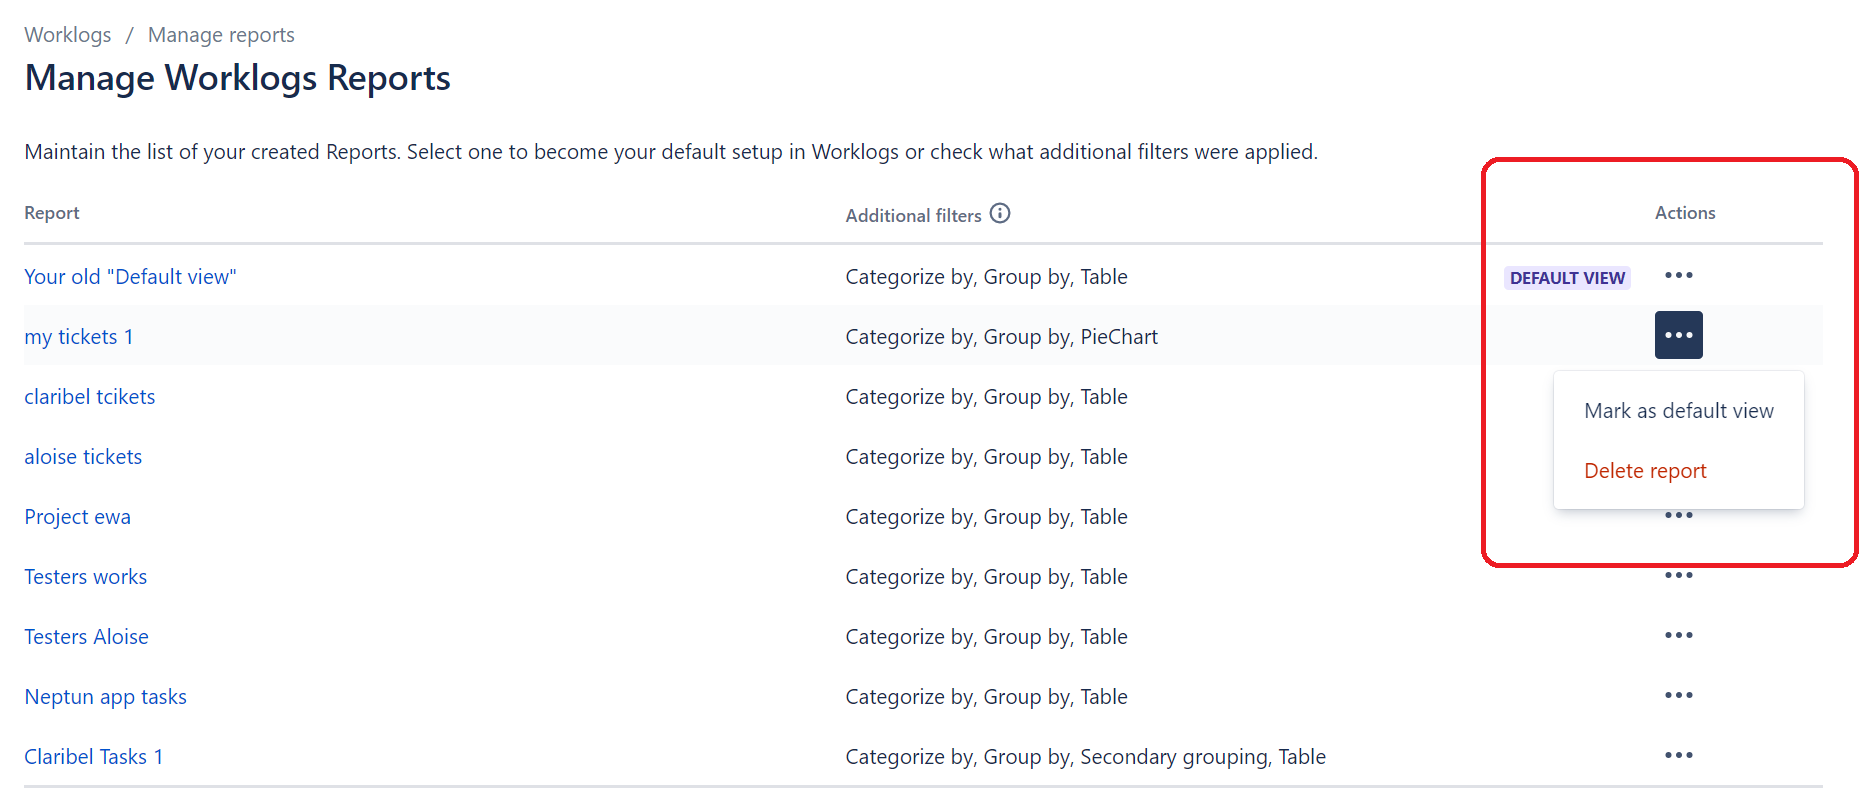
Click the three-dot menu to open ‘Actions’ that you can take with your saved Reports. You can Delete report which is no longer needed. The ‘Make as default view’ option allows you to load the most frequently used report as the initial view displayed every time you open the Worklogs page.
Delete your saved report
To delete your saved report:
-
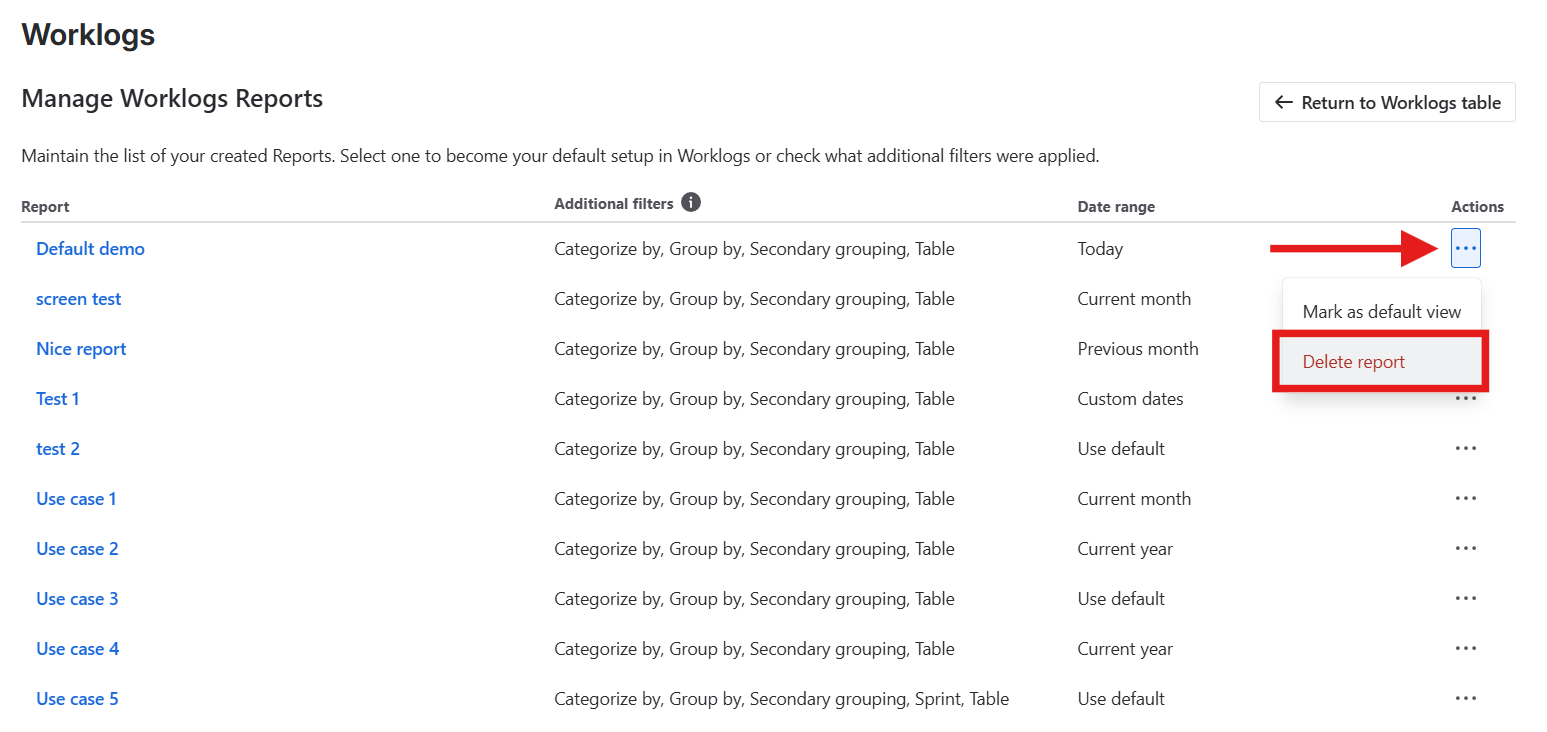
Click the three-dot menu to open the Actions menu for your saved reports.
-
Select Delete report to remove any reports that are no longer needed.
Do you have any questions or feedback? Feel free to contact us here 💡